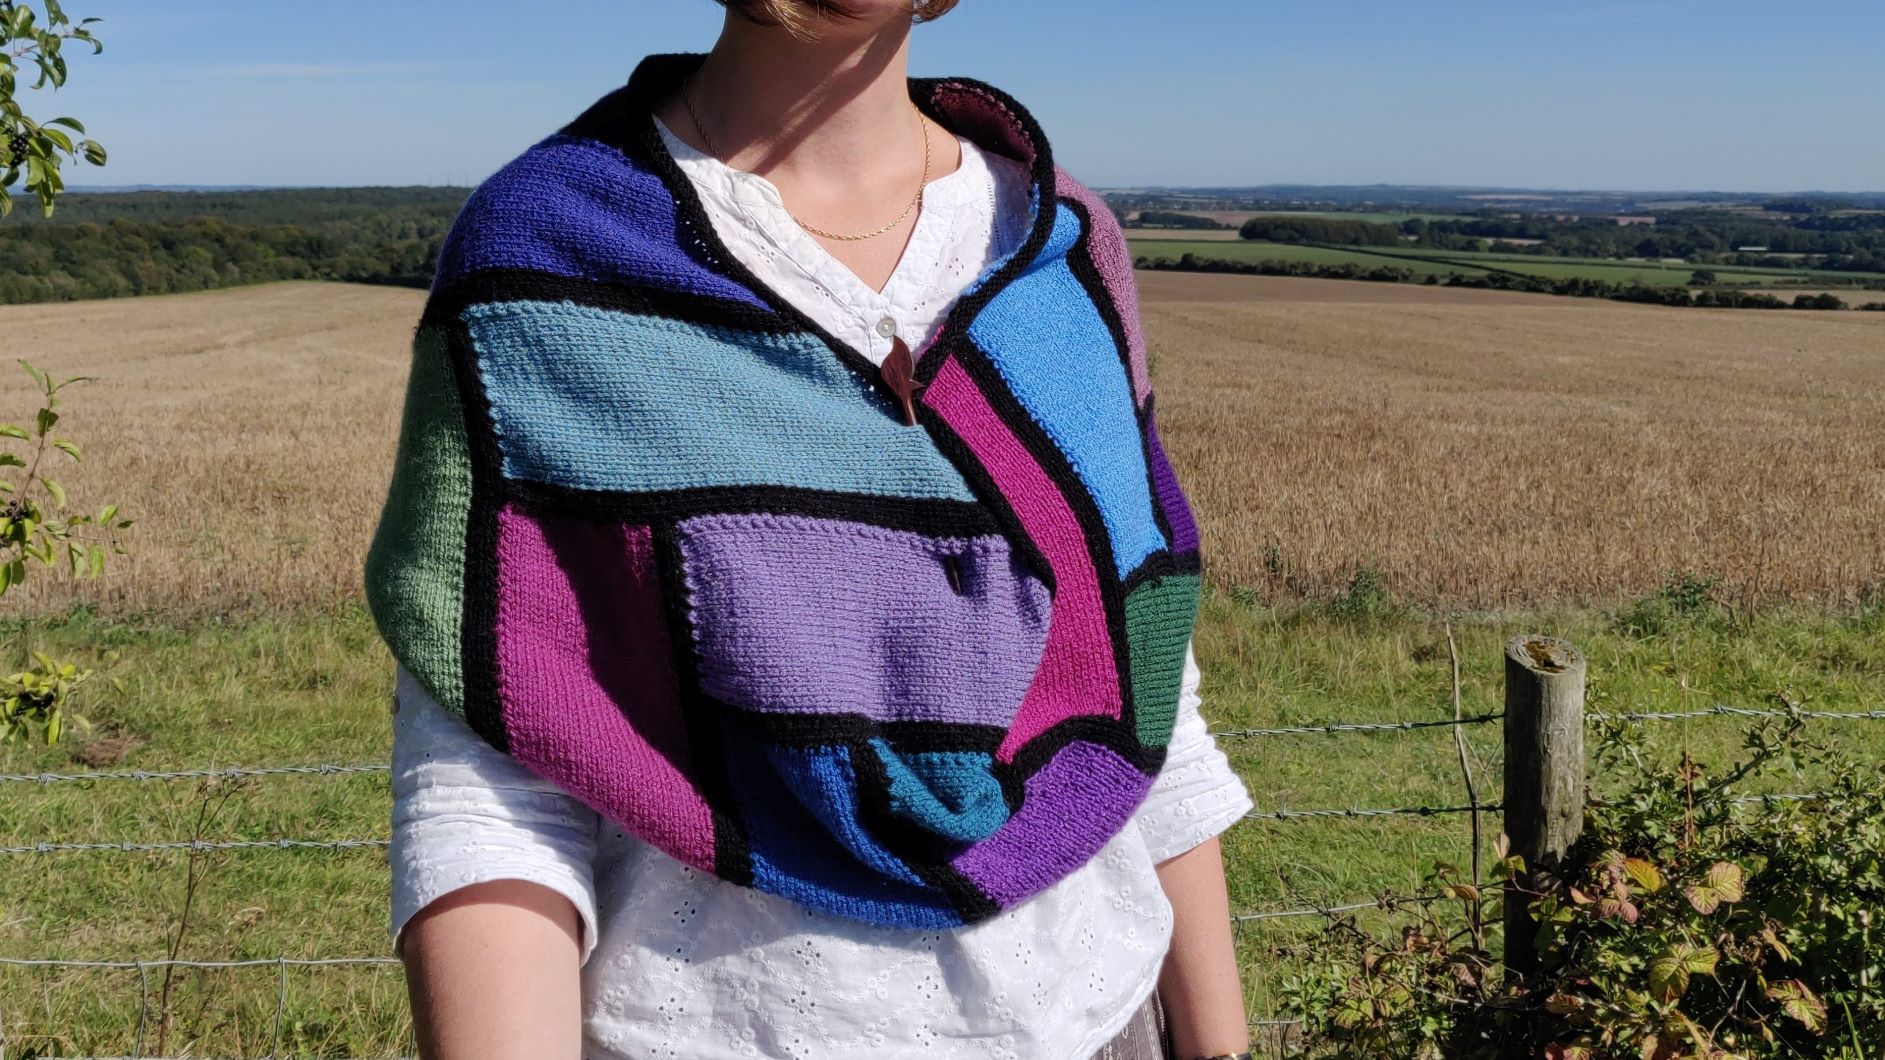
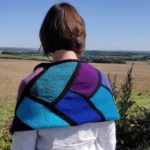
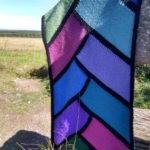
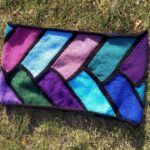
This friendship cowl knitting pattern is the perfect stash buster project and provides a splash of colour on misty grey autumn days. I love the flexibility in the number of ways that it can be worn, and also that the basic pattern can be the basis for many things- the cowl, a scarf, a shawl, a blanket. The strong colour choices paired with the black border was inspired by the glorious colours of stained glass windows- such as this detail from a window in York Minster shared by Jules and Jenny from Lincoln, UK [CC BY 2.0]. As a bonus, I used up yarn from previous projects, such as my Moorland Shawl and crocheted blankets.


Abbreviations
k knit, k2tog knit 2 together, kfb increase: knit into front and back of stitch, p purl, p2tog-tbl purl 2 together through the back loop, RS right side, WS wrong side, s1 slip 1 st, st(s) stitch(es)Alternative Edging
If you don’t have cable needles, or prefer not to work in the round, then use this edging instead of the edging suggested in the pattern.
With WS facing, place the live sts from one strand on to a knitting needle. ON THE SAME NEEDLE, cast on 4 sts. You can use a provisional cast on for a seamless finish, or your preferred method.
1st row: k3, k2tog (one st from cast on and one st from other needle). Turn.
2nd row: k4
Repeat rows 1 and 2 along the edge. When you run out of sts from one strand, move on to the next until all live sts have been incorporated into the edge.
To finish: either remove provisional cast on and graft the live sts together, or cast off 4 st and seam to the cast on edge.
Making a scarf
It is very easy to adapt the main friendship cowl knitting pattern to a scarf, rather than a cowl. As the ends are not joined in a circle, working this pattern as a scarf also opens up options of using it as a basis for a blanket or shawl. Scroll down to see some ideas on how to do this, but first – how to make the pattern into a scarf.
Work as for the main pattern, repeating strands C and D for as many times as you want depending on the length of the scarf. DO NOT work strands E and F. Instead use the alternatives given here:
Strand E
This strand will be partially worked without a border. With RS facing, and working on border sts just completed, start picking up sts. Start 13st from end nearest to strand C. Using border colour pick up 2 sts from each of the first two sts (4sts). Change to main colour, pick up 1 st from first st, 2 sts from next 9 sts, 1 st from the next st (24 sts).
The 20sts will be worked in main colour throughout, and the 4sts in border colour throughout.
Foundation row: s1, p to end
1st row: s1, k to end, pick up st from the border edge of previous strand.
2nd row: p2tog-tbl, p to end
Repeat rows 1 and 2, working another 21 rows.
24th row: p2tog-tbl, p19, cast off 4 border sts. Working in main colour only:
25th row: s1, k to end, pick up st from border edge of strand C
26th row: p2tog-tbl, p to end
Repeat rows 25 and 26, working another 24 rows.
You should use all the sts from the border edge of strand C. Shape top as for strand A given in main pattern, working fewer rows as you don’t have the border sts.
Strand F
This strand is worked without a border. With RS facing and working along border sts just completed, pick up and knit 1 st from first st, 2 sts from next 9 sts, 1 st from the next st. (20sts)
Foundation row: s1, p to end, pick up st from the border edge of strand B
1st row: k2tog, k to end
2nd row: as foundation row
Repeat rows 1 and 2, working another 48 rows.
Shape top as for strand A, working fewer rows as you don’t have the border sts.
Edging
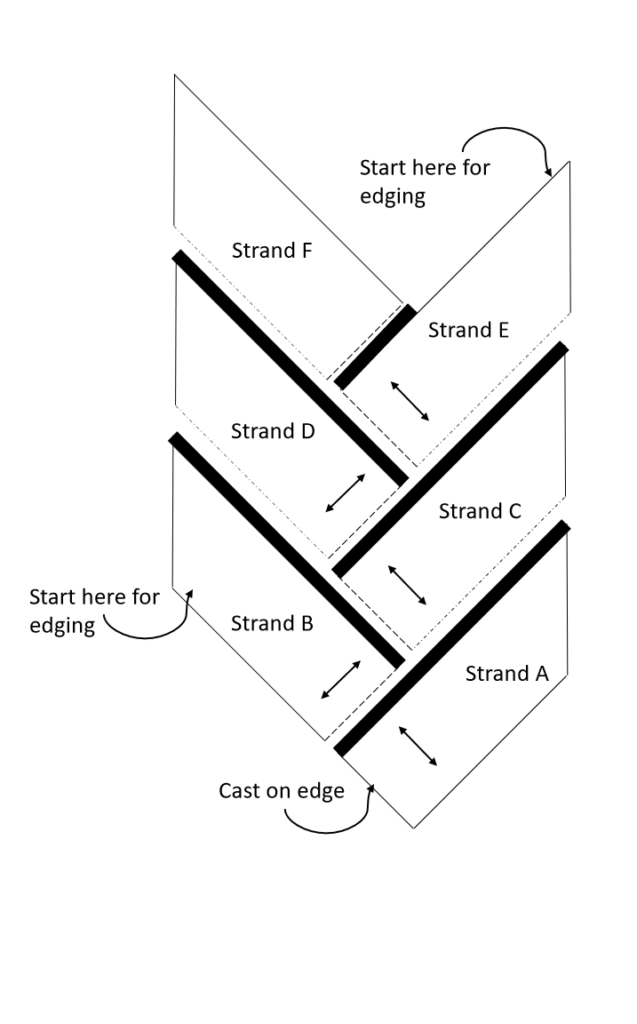
Both the long sides and the short sides of the scarf will be edged to prevent curling. The short sides can be divided into the one that points outward, and the one that points inward.
Outward pointing edge
Cast on 1 st.
1st row: k1, with RS facing pick up st from strand B just before the top shaping (see diagram).
2nd row: k2tog.
3rd row: kfb, pick up next st
4th row:k2tog, k1
5th row: k1, kfb, pick up next st
6th row: k2tog, k2
7th row: k1, kfb, k1, pick up st
8th row: k2tog, k3
9th row: k4, pick up st
10th row: k2tog, k3
Repeat rows 9 and 10 until you reach the end of Strand B. The corner will be turned with short row shaping:
Work rows 9 and 10 to anchor into the final edge st.
11th row: k3, turn
12th and every alternate row: k to end
14th row: k2 turn
16th row: k1 turn
18th row: k2 turn
20th row: k3 turn
Repeat rows 9 and 10 along next side of edge. 3 sts before end work shaping:
21st row: k1, k2tog, k1, pick up st
22nd and every alternate row: k2tog, k to end
21st row: k1, k2tog, pick up st
23rd row: k2tog, pick up st
24th row: k2tog
Cast off.
Inward pointing edge
Cast on 1 st.
1st row: kfb
2nd row: k2
3rd row: k1, kfb
4th row: k3
5th row: k2, kfb with RS facing pick up st from strand E at top most point (see diagram).
6th row: k2tog, k3
7th row: k4, pick up st
8th row: as row 6
Repeat rows 7 and 8 until you reach the cast off sts for the border of strand E. There should be 3 clear sts to the junction between strand F and E. The corner will be turned with short row shaping:
9th row: as row 7
10th row: as row 8
11th row: as row 7
12th row: k2tog, k2 turn
13th row: k3, pick up st
14th row: k2tog, k1
15th row: k2, pick up st
16th row: k2tog, turn
17th row: k1, pick up st
18th row: k2tog, k1 turn
19th row: k2, pick up st
20th row: k2tog, k2 turn
21st row: k3, pick up st
22nd row: k2tog, k3
23rd row: k4, pick up st
24th row: as row 12
Repeat rows 23 and 24 and work along the edge of strand F. After working final edge st for strand F, work edge shaping:
25th row: k4
26th row: k2tog, k2
27th row: k3
28th row: k2tog, k1
29th row: k2
30th row: k2tog
Finish ends.
Long edges
The edging will be worked as for the alternative edging given previously. When working across the top/ bottom of the outward and inward pointing edging you will need to pick up a st rather than using the live sts. Plan to pick up 3 sts evenly across the edging.
With WS facing, place the live sts from one strand on to a knitting needle. ON THE SAME NEEDLE cast on 4 sts.
1st row: k4, pick up st from edging
2nd row: k2tog, k3
Repeat rows 1 and 2 twice more, evenly spacing the picked up sts on the short edge border.
7th row: k3, k2tog (one st from border colour, and 1 st from the live sts on needle)
8th row: k4
Repeat rows 7 and 8 along the edge. When you run out of sts from one strand, move on to the next until all live sts have been incorporated into the edge.
Work across the final short edge border by repeating lines 1 and 2 three times.
Cast off and weave in ends.
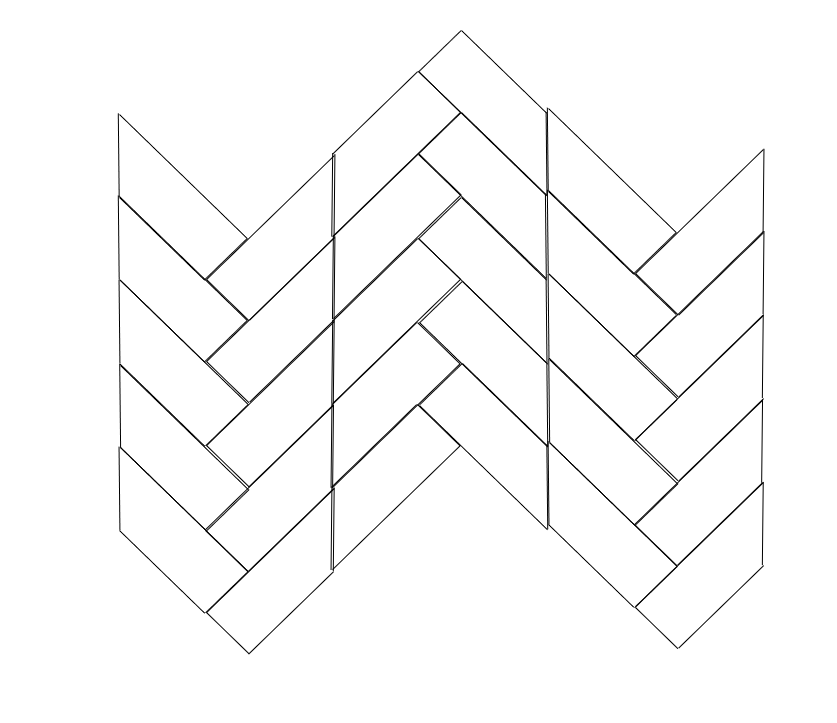
Making a shawl or blanket
Several scarfs can be joined along their long edges to make a larger fabric. This could be shaped into a shawl or blanket, depending on your requirements. See the diagrams for some ideas for arranging these. There are several methods of joining the edges:Option 1: (requires cable needles)
Pick up all sts along the edge. Work as many rows as desired in stocking stitch. The live sts of both scarfs can then be grafted together using kitchener st for a seamless join.
An alternative is to work the number of rows required and then cast off. The two long edges can then be seamed together.
Option 3:
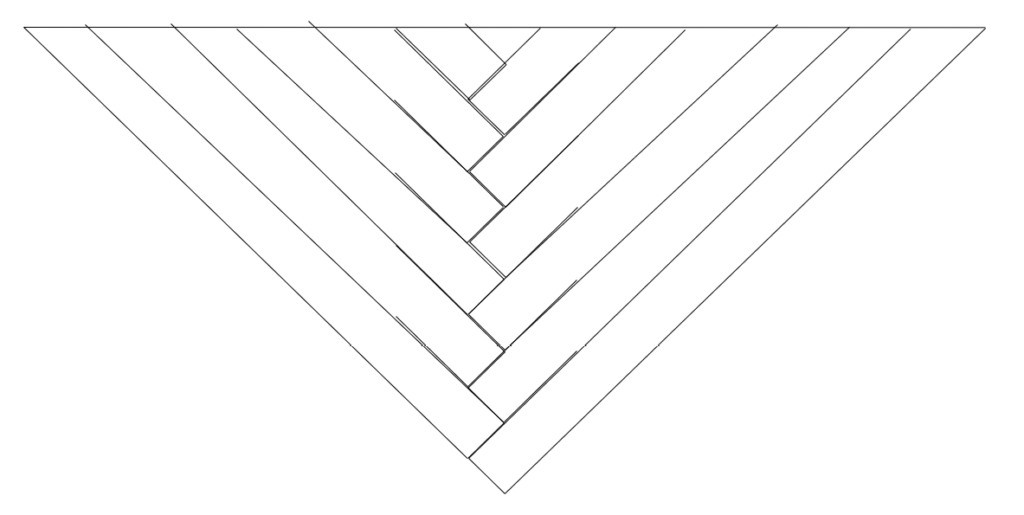
You can make a striking triangular shawl by playing about with the length of each strand. You would also need to adapt the top shaping to ensure a straight horizontal line, rather than the vertical line as given the main pattern. You can do this by reversing all the shaping instructions.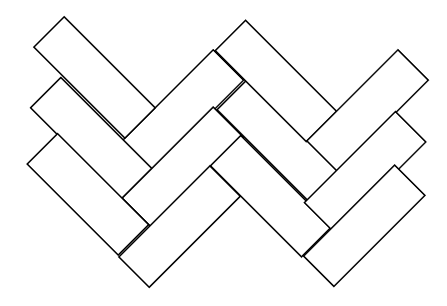
Option 2:
The edges can be joined by hooking into the live st on each strand in a similar way to the join used in the main friendship cowl knitting pattern. With RS facing, place the live sts from one scarf on one needle, and with WS facing the live sts from the other scarf onto a second needle.
Cast on 4 st on to needle with RS facing. As you start knitting, make sure that the RS of fabric is showing towards you from both needles.
1st row: k3, k2tog (one st from border, one st from strand)
2nd row: p3, p2tog-tbl (one st from border, one from other strand)
Repeat rows 1 and 2 along the edge.
Cast off.