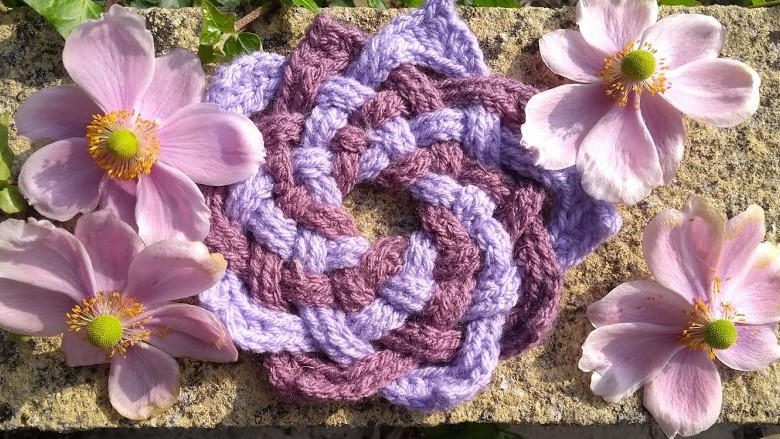
For those of you following this adventure into celtic knots, you will be aware that I left the last post pondering whether a ten point knot was possible. Well, yes, it is! And – good news – it wasn’t too much of a brain ache in order to weave it into shape. You may be wondering when a ten point shape could ever be used, and you may have a point. Most of the time eight points should be enough. However, the more points you have the closer to a circle the finished design looks to the eye. This could perhaps form the centre of a mandala or afghan, or possibly a circular shawl? I’m sure there may be other uses that I have not yet thought of (coaster? place mat?).
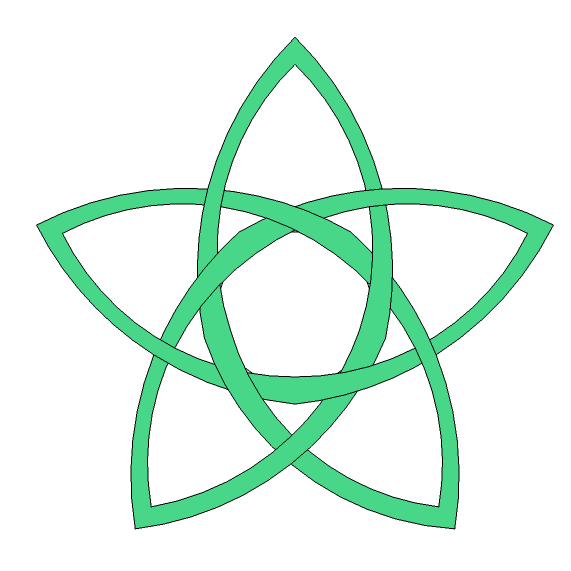
To get to a ten point knot, the idea is to combine two pentagon shapes together. You can see this on the right. The usual rules of celtic knotwork apply: each strand needs to cross the next in an alternating over, under, over, under pattern. So, time to work out how to convert this diagram into crochet.
The construction of the ten point knot
In the last post, I talked about the family of knots that I call the double loop knots. When this construction method is used for an odd numbered polygon a simpler continuous loop knot results. I have given the diagram for the pentagon on the left. It is constructed by moving around the shape, forming every other point as you go (1,3,5,2,4).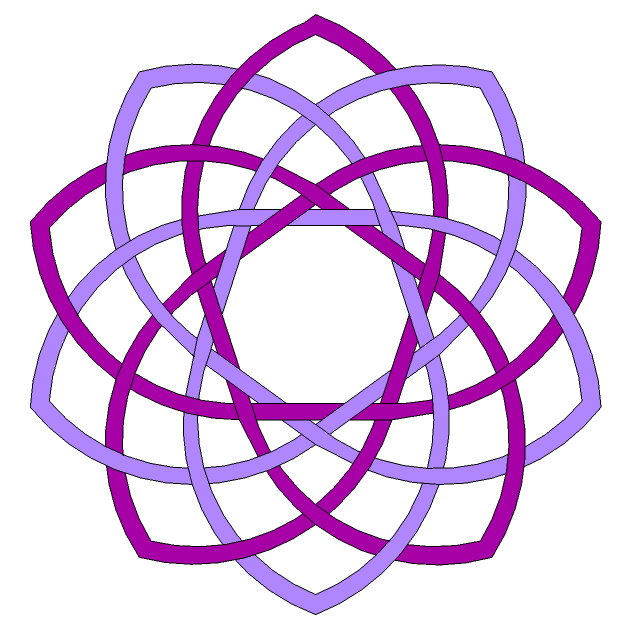

Ten point double loop knot
When crocheted with DK yarn on a 4 mm hook, this motif measures approximately 14 cm (5.5 inches) from point to point.
Instructions are given in UK terms. To convert to US terms: dc = sc, htr = hdc and tr = dc.
Make two.
Row 1: *ch 16, picot, ch 16. Repeat from * four more times.
Row 2: ch 1, *1 dc into next 13 stitches, 1 htr into next st, 1 tr into next st, tr3tog, 1 tr into next st, 1 htr into next st, 1 dc into next 13 stitches. Repeat from * four more times.
Fasten off, leaving a tail to weave in later.
If you prefer working by chart, the repeat sequence is given below (between indicators 1 and 2). You need to work this five times, then ch 1 to turn the row.

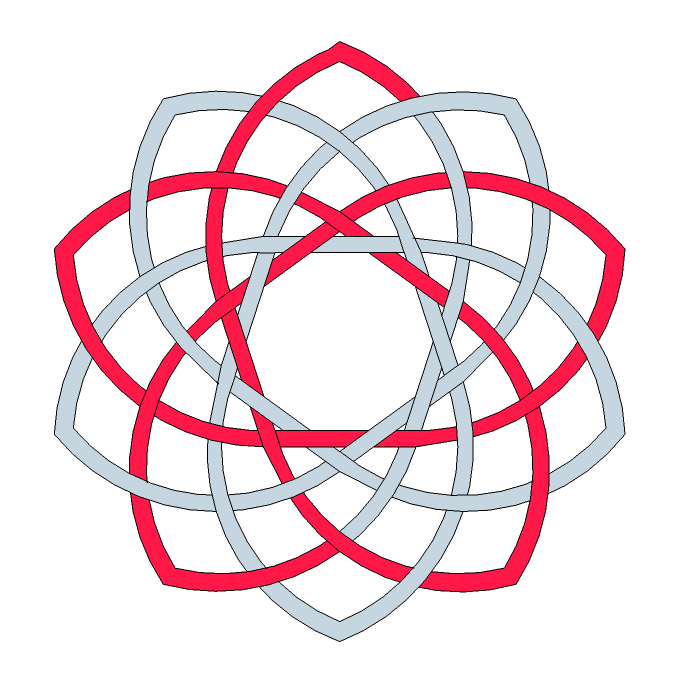
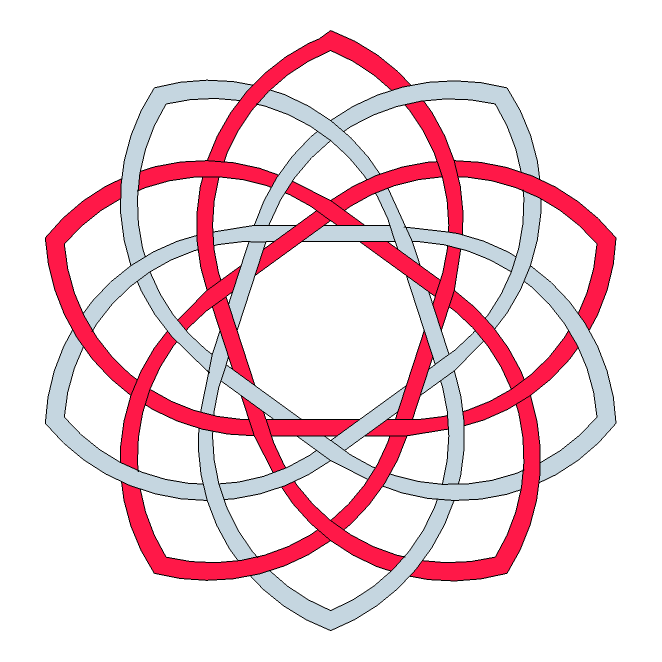
The next step is to weave the ten point knot together. As this is a quite complex weave, I have included both photos and the diagram of the knot. In the diagram, the grey lines represent strands of the knot which have not yet been places, and the red lines show what has already been pinned in place.
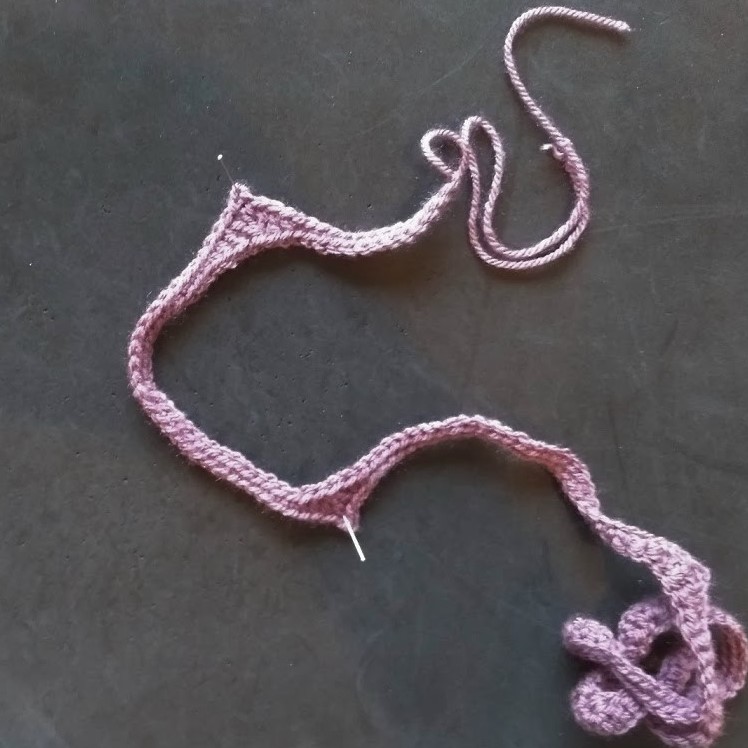

Step 1
Working on the first pentagon, pin the first picot at the top, with the yarn ends to the left. Sweep down and round to the bottom left to pin the second point.
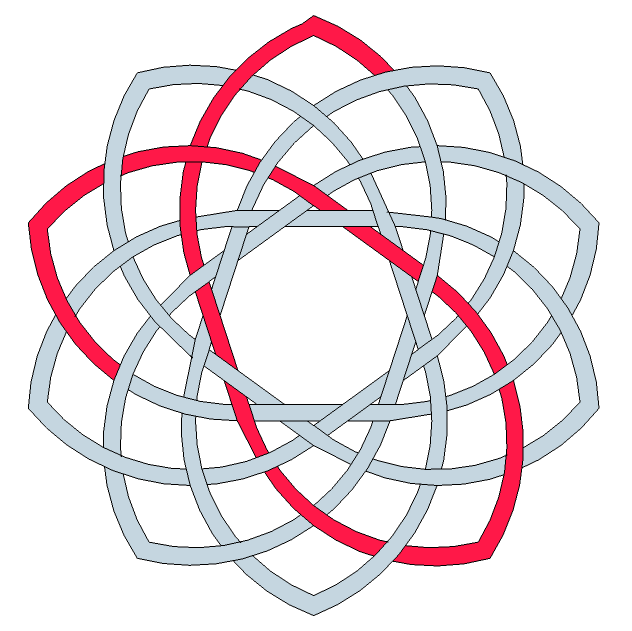
Step 2
Continue around the pentagon, returning to the top right. You need to go over the previous strand.

Step 3
And back again to the top left. The intersections are getting a little harder now: you need to go under the first strand and over the second.
Step 4
Working on the last point of the first pentagon now. You need to come back to the bottom right, crossing under, the over TWICE. Don’t worry, we will come back to fill in these intersections later to make sure the alternating over and under crossings are correct.
Step 5
Complete the first pentagon by joining the end to the beginning. Double check the over and unders before seaming together. I would strongly recommend NOT cutting the tails just yet – wait until the whole knot is completed, just in case something is not right and you have not spotted it yet.

Step 6
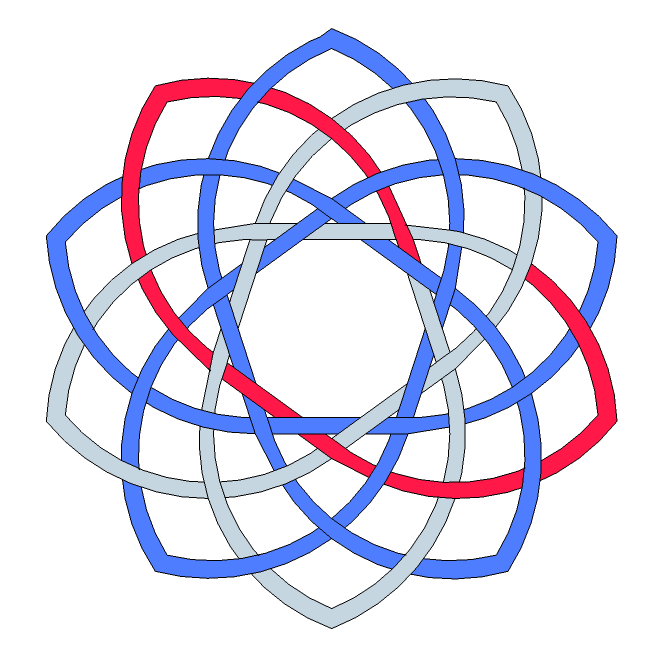
On to the second pentagon! Things are starting to get a bit tricky now, so spend some time to get set up right. The blue lines in the diagram represent the first pentagon, the red lines are the second pentagon that have been placed, and the grey lines are yet to be completed. Try and pin out your first pentagon to match the blue lines. I suggest a pin on each point of both the outer and inner pentagons. the point of the inner pentagon is the intersection that falls just inside the main points. As you keep weaving you will find that you can remove these inner pins. But, right now, you need to start to add the second pentagon, starting at the top left, with the right leg underneath the first pentagon.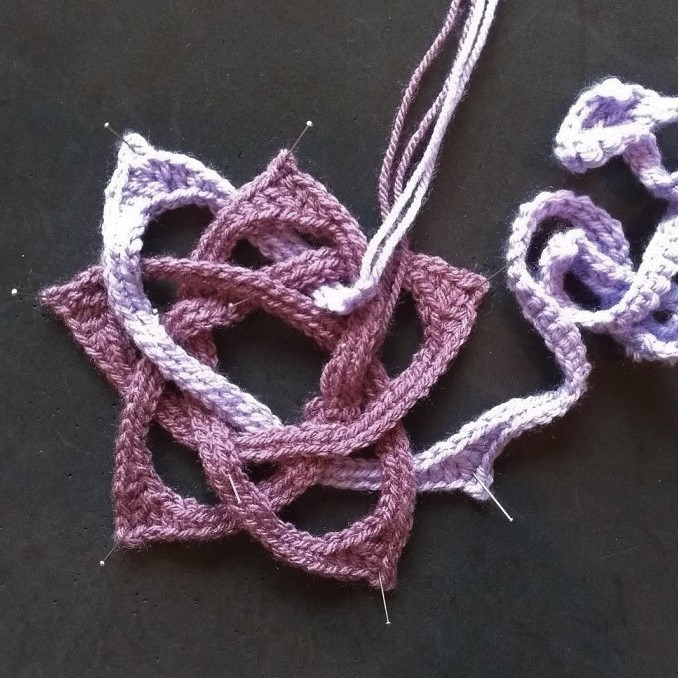
Step 7
Working round to the second point, you need to go over the first three strands of the first pentagon, then under the remaining strands.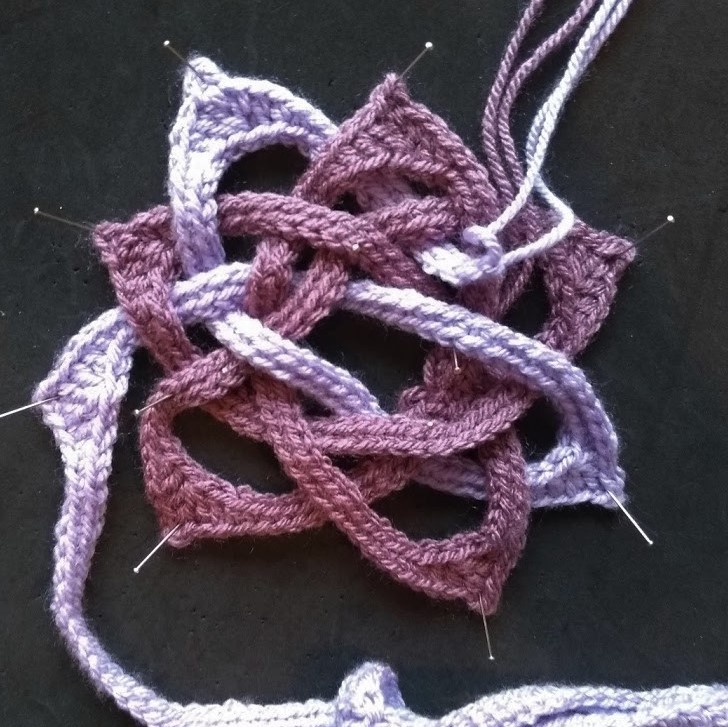

Step 8
Continuing to the third point now, on the left. You need to go over the first three strands of the first pentagon. You will touch the tail end of the second pentagon as you go. Under the next two strands, over the second pentagon, then under once more.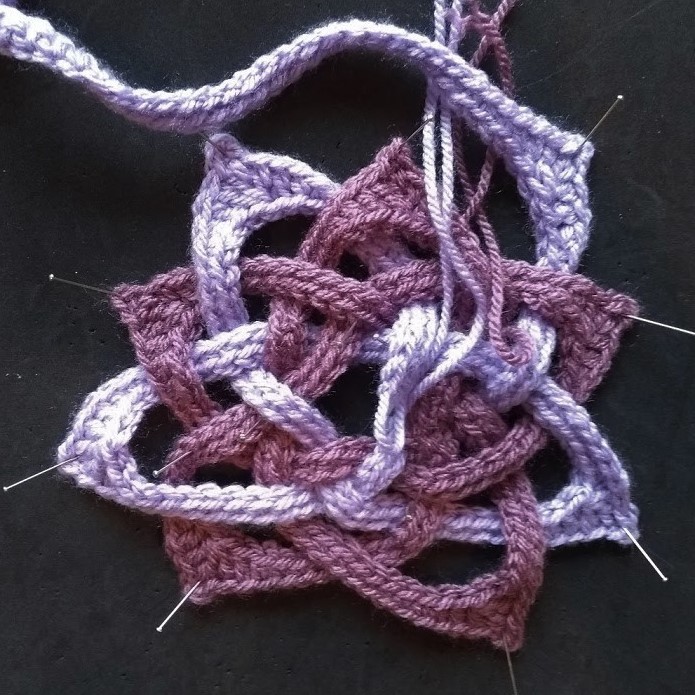
Step 9
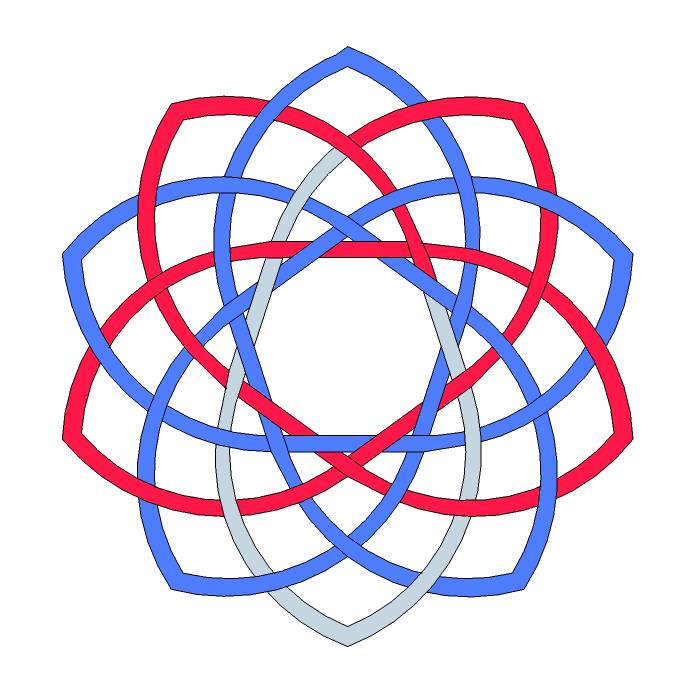
Time to start concentrating, you now need to think about both getting the under / over right, but also crossing the strand in the right place within the knot. You are heading up to the top right. You need to go over the first two strands of the first pentagon, under the second pentagon to form an intersection near the bottom of the knot. Over the first pentagon, then under two strands, before making going over the second pentagon to make an intersection inside the top right point of the first pentagon. Take a breath, head under this point and you are there.

Step 10
I have tried to make things clearer here, by showing the current strand in turquoise on the diagram. this should help to work out where you need to go and which strand is which. You may need to go hunting for some strands that are towards the back and underneath others. Head down to the bottom of the knot, alternating over and unders as you go. Make sure you are crossing the correct strand in the correct order.


