Step 1
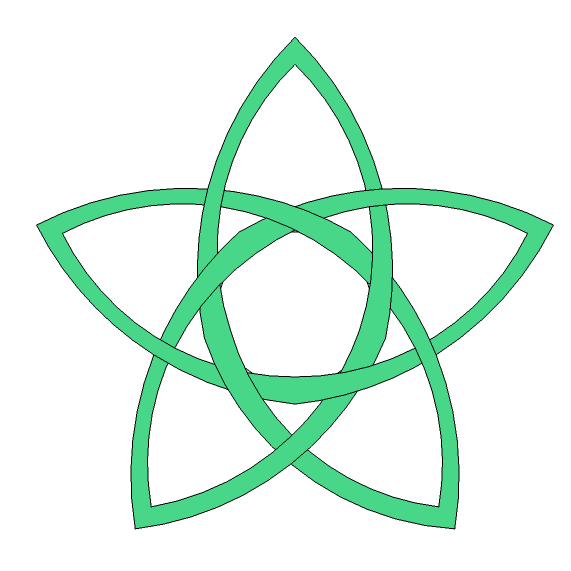
Working on the first pentagon, pin the first picot at the top, with the yarn ends to the left. Sweep down and round to the bottom left to pin the second point.
Step 4
Working on the last point of the first pentagon now. You need to come back to the bottom right, crossing under, the over TWICE. Don’t worry, we will come back to fill in these intersections later to make sure the alternating over and under crossings are correct.
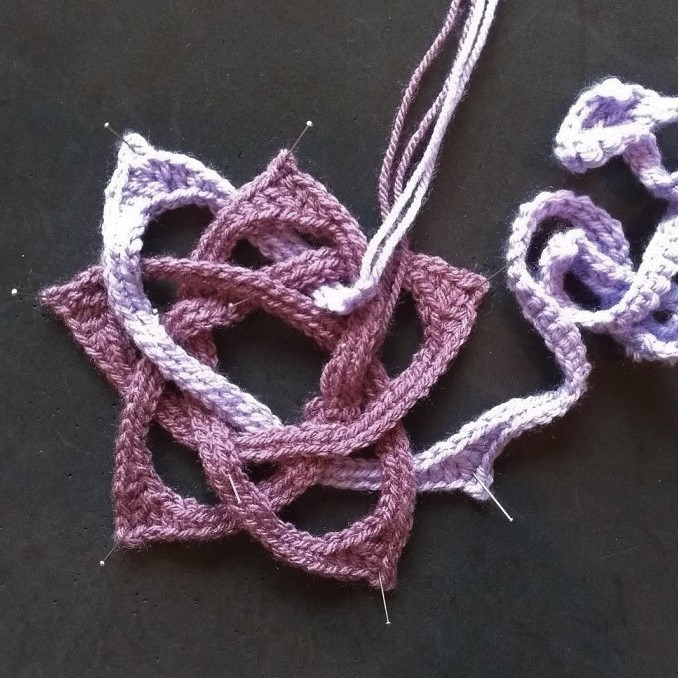
Step 5
Complete the first pentagon by joining the end to the beginning. Double check the over and unders before seaming together. I would strongly recommend NOT cutting the tails just yet – wait until the whole knot is completed, just in case something is not right and you have not spotted it yet.
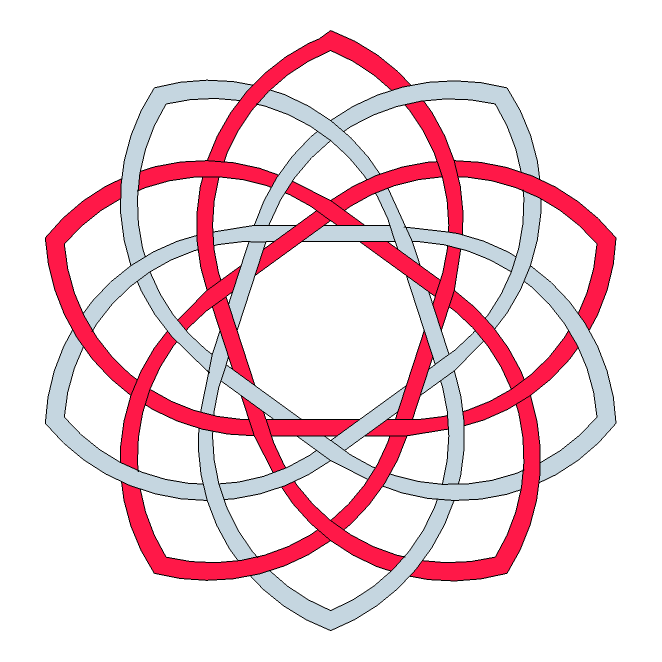
Step 6
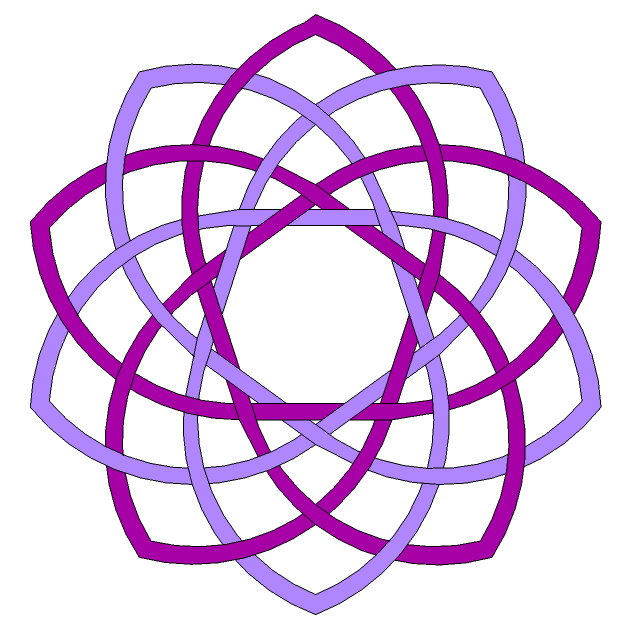
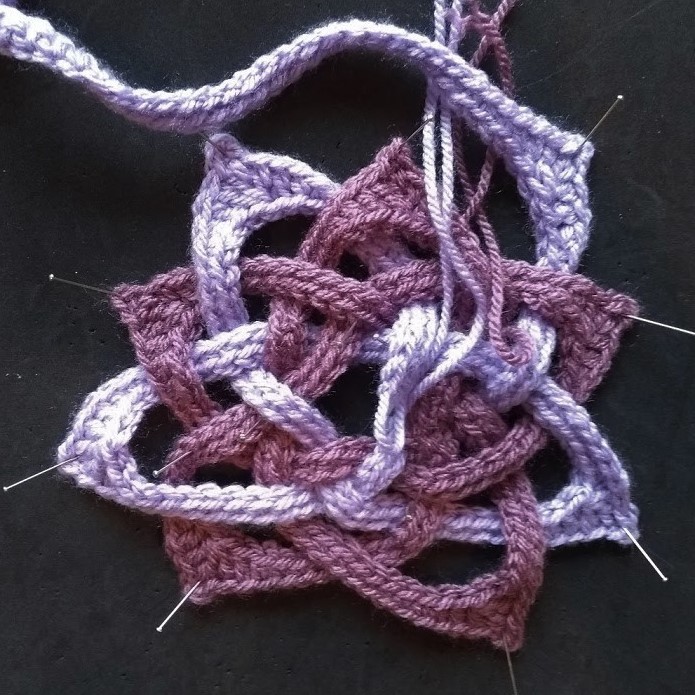
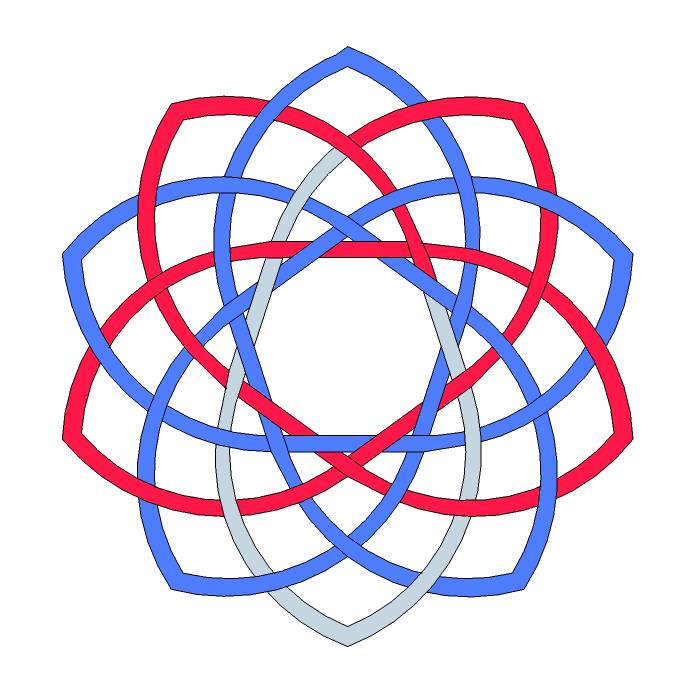
On to the second pentagon! Things are starting to get a bit tricky now, so spend some time to get set up right. The blue lines in the diagram represent the first pentagon, the red lines are the second pentagon that have been placed, and the grey lines are yet to be completed. Try and pin out your first pentagon to match the blue lines. I suggest a pin on each point of both the outer and inner pentagons. the point of the inner pentagon is the intersection that falls just inside the main points. As you keep weaving you will find that you can remove these inner pins. But, right now, you need to start to add the second pentagon, starting at the top left, with the right leg underneath the first pentagon.
Step 7
Working round to the second point, you need to go over the first three strands of the first pentagon, then under the remaining strands.
Step 8
Continuing to the third point now, on the left. You need to go over the first three strands of the first pentagon. You will touch the tail end of the second pentagon as you go. Under the next two strands, over the second pentagon, then under once more.
Step 9
Time to start concentrating, you now need to think about both getting the under / over right, but also crossing the strand in the right place within the knot. You are heading up to the top right. You need to go over the first two strands of the first pentagon, under the second pentagon to form an intersection near the bottom of the knot. Over the first pentagon, then under two strands, before making going over the second pentagon to make an intersection inside the top right point of the first pentagon. Take a breath, head under this point and you are there.
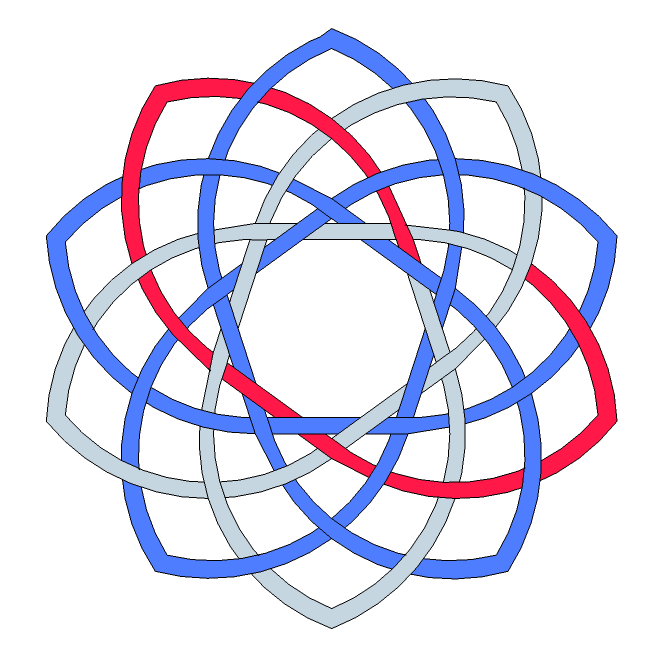
Step 10
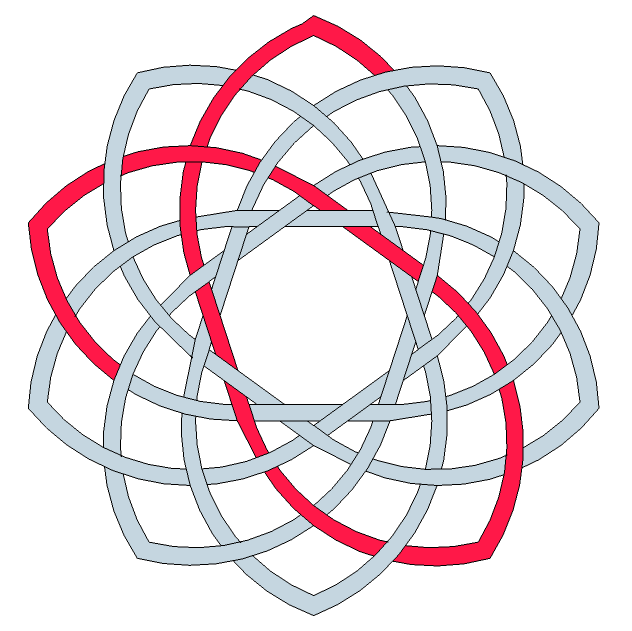
I have tried to make things clearer here, by showing the current strand in turquoise on the diagram. this should help to work out where you need to go and which strand is which. You may need to go hunting for some strands that are towards the back and underneath others. Head down to the bottom of the knot, alternating over and unders as you go. Make sure you are crossing the correct strand in the correct order.
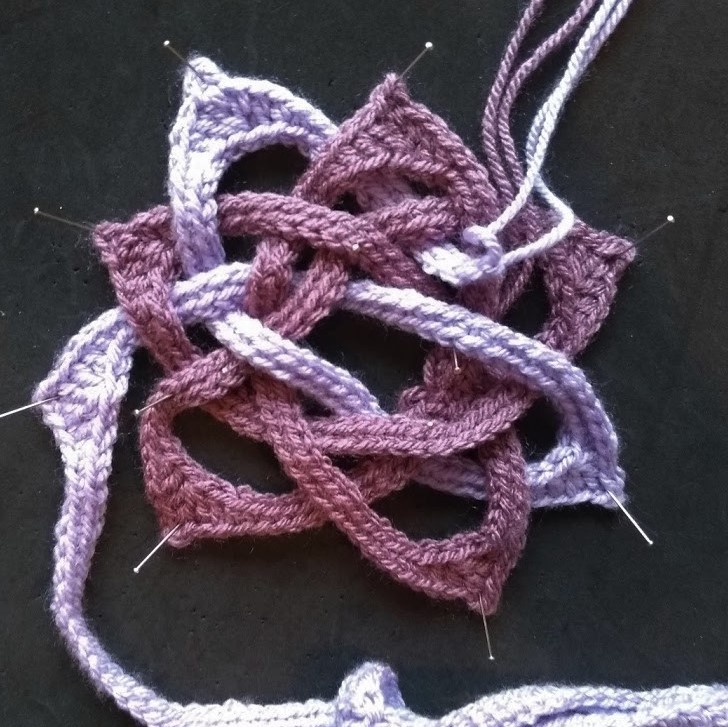
Step 11
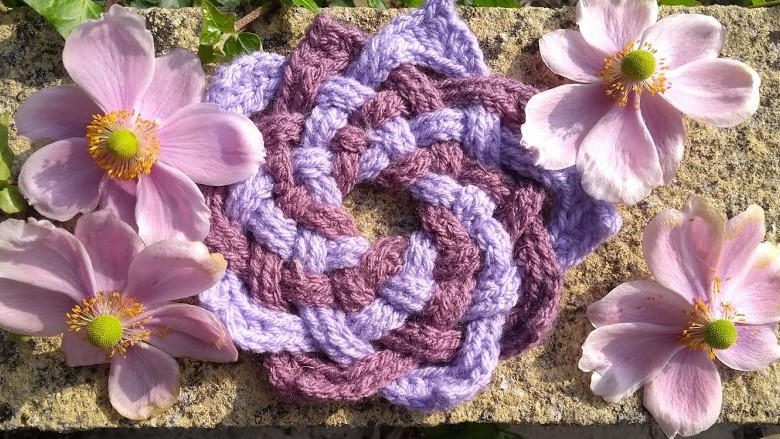
And finally, bring the ends to join, again alternating the over and unders. Take a moment to check the whole knot, by following each pentagon around and check that everything is as it should be. If you are happy, seam the second pentagon and weave in the ends. Look on in triumph and enjoy your ten point celtic knot.