Kitchener stitch can be used to join two sets of live stitches together. The technique creates an invisible join, as the yarn mimics the shape of the stitches. This tutorial explains how to join stocking stitch, but you can also use the kitchener stitch technique to join garter-stitch or other patterns.
In order to use the kitchener stitch successfully, it is important that you have the same number of stitches on both needles when you start to join them together.
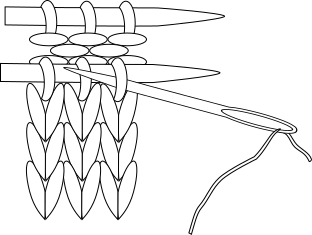
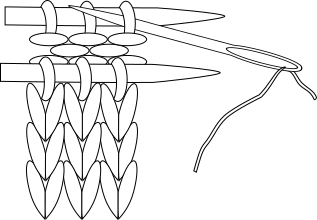
Set-up
Begin by holding the needles in one hand parallel to each other, with the right side of the stocking stitch to the outside. Cut your yarn, leaving a tail that is at least double the distance that you want to graft. Thread the end of the yarn through your yarn needle.
Step 1
Insert your yarn needle through the first stitch on the front knitting needle as if to purl. Pull yarn through but leave the stitch on the knitting needle.
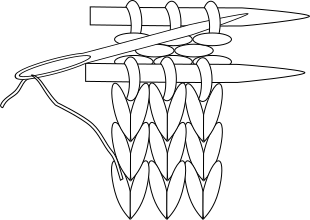
Step 2
Next insert your yarn needle through the first stitch on the back knitting needle as if to knit. Pull the yarn through but leave the stitch on the knitting needle.
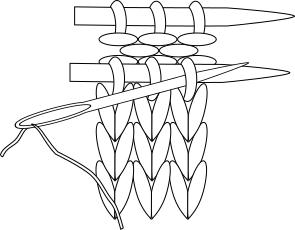
Step 3
Insert the yarn needle into the first stitch on the front knitting needle as if to knit. Slip this stitch on to the yarn needle.
Step 4
Next insert the yarn needle into the next stitch on the front knitting needle as if to purl and pull the yarn through, leaving the stitch on the knitting needle.
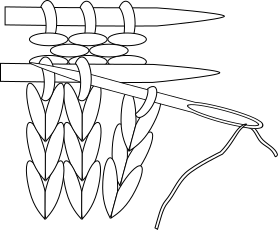
Step 5
Insert the yarn needle into the first stitch on the back knitting needle as if to purl. Slip this stitch on to the yarn needle.
Step 6
Next insert the yarn needle into the next stitch on the back knitting needle as if to knit and pull the yarn through, leaving the stitch on the knitting needle.
Repeat steps 3-6 for all the remaining stitches. Adjust your tension so the grafted stitches match your previous stitches.