There are times in knitting when you want to make a large increase in the number of stitches. This is commonly found in closed loop cables and also in some types of lace knitting. As always, there are several different techniques to work these increases. In this post, I concentrate on the 1 to 5 increase, but these techniques can be adapted to suit any number of increases from one stitch.
Types of 1 to 5 increases
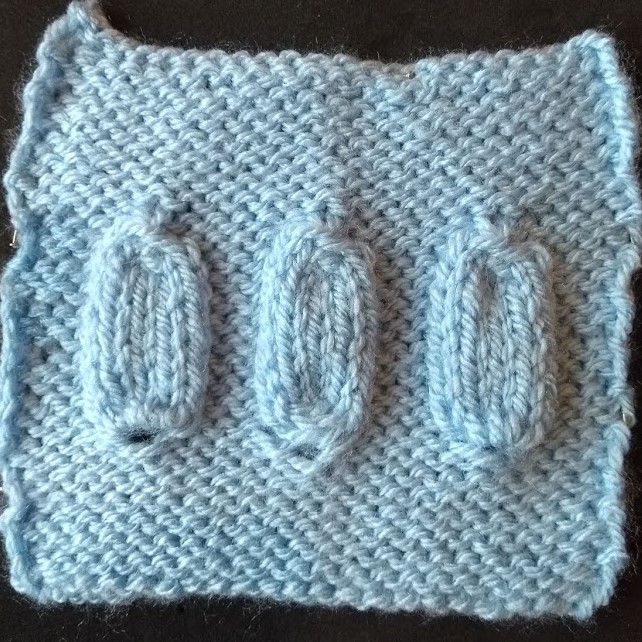
In the swatch on the left I have worked three increases, each using a different technique. The left-most increase is a bar increase, using front and back loops of the starting stitch. The centre increase uses a cable cast-on, and the rightmost increase uses yarn overs. I will talk about each of these in turn
The knit front and back increase
This is arguably the easiest of all the increases to work. You work it by alternatively knitting into the front then back loop of the same stitch before dropping it from the needle. To increase to five stitches, you would work the front, back, front, back and front loop of one stitch. As you can see from the swatch, this means that you have five loops of yarn in one stitch.
Inevitably, this will stretch that stitch, resulting in a hole. I’m not sure of any application where I would choose this increase, unless I could incorporate the hole in to a decorative element.
The yarn over increase
To work this increase, you first knit into the starting stitch but do not drop it from the needle, yarn over, knit again, yarn over and knit one last time before dropping the stitch from the needle. This reduces the hole made from the starting stitch as there are only three loops within this first stitch.
Whilst there is still a small hole with this technique, this is minimised. The stitches sit evenly from the increases. I would choose this technique for most lace work.
The cable cast-on increase
This increase is worked by casting on two stitches each side of the starting stitch. Whilst there is some distortion of the fabric at the increase, there is no hole. it is hard to see from the swatch, but the increased stitches meet together in the middle, then move outward. This makes this increase ideal for closed loop cables, when you want the increased stitches to diverge from each other.
Working the cable cast-on increase
All stitches are slipped with the needles point to point – as if to purl, but with the yarn at the back of the work.
Step 1
Work to the stitch that will be increased, here marked in green. Insert the needle between that stitch and the next. Wrap yarn around needle and draw through a loop to create a stitch.
Step 2
Slip the increase (green) stitch to the working needle. Insert the holding needle between it and the newly created stitch (shown in purple). Wrap the yarn around the needle and draw through a loop to create a stitch.
Step 3
Slip the increase (green) stitch to the holding needle. Insert the working needle between it and the newly created stitch (shown in purple). Wrap the yarn around the needle and draw through a loop to create a stitch.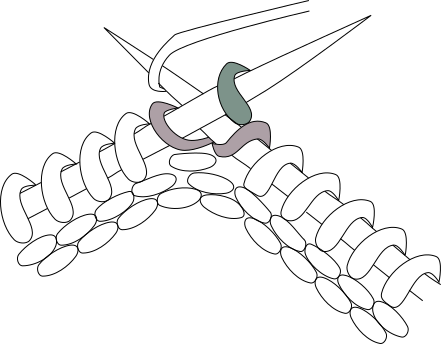
Step 4
Slip the increase (green) stitch to the working needle. Insert the holding needle between it and the newly created stitch (shown in purple). Wrap the yarn around the needle and draw through a loop to create a stitch.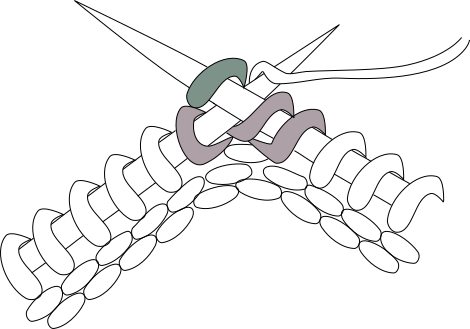
Step 5
Slip the 2 newly created stitches to the working needle. The increase is complete.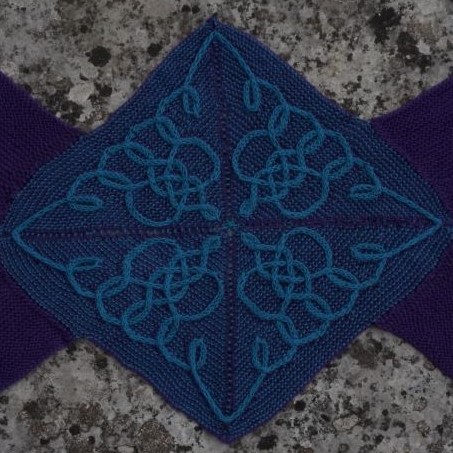
Above you can see the cable cast-on being used in the wild. This is from my Drogo wrap. The square is worked in the round from the centre out. Each new loop of a cable begins with a 1 to 5 cable cast-on increase.