Stitch markers are one of those things that you don’t think you need, until you finally get some, and then you wonder how you ever managed without them. Recently, I have started to knit all my projects on cable needles. Mainly, I am I honest, because when Monster and Menace grab them, the stitches are much harder to pull off. Also I’ve been exploring more lace knitting and so decided that I needed to upgrade the paperclips I had been using into proper handcrafted bead stitch markers – but rather than buy them, why not make my own from beads and jewellery findings?
Making the bead stitch markers
I started by researching on YouTube – what a marvellous invention – to see how to make drop earrings. After all, bead stitch markers are really just earrings on a ring. From this, I learned the techniques I needed (a plain loop) but also the findings that I would need (eye-pins and jump rings). I also needed a set of pliers, easily bought from Hobbycraft.
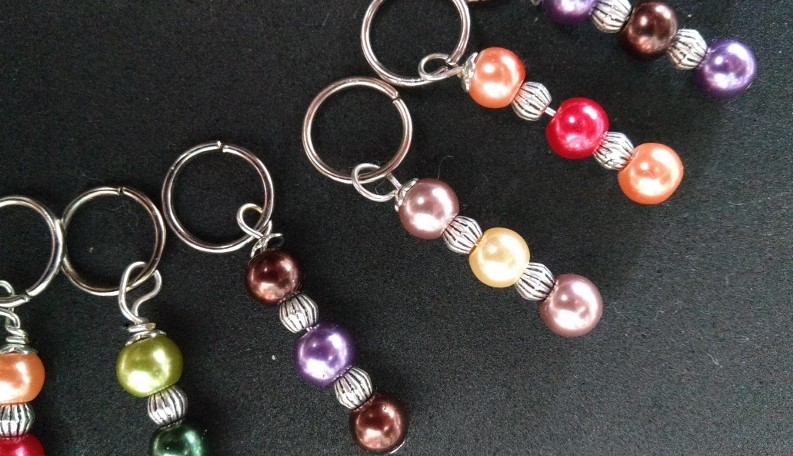
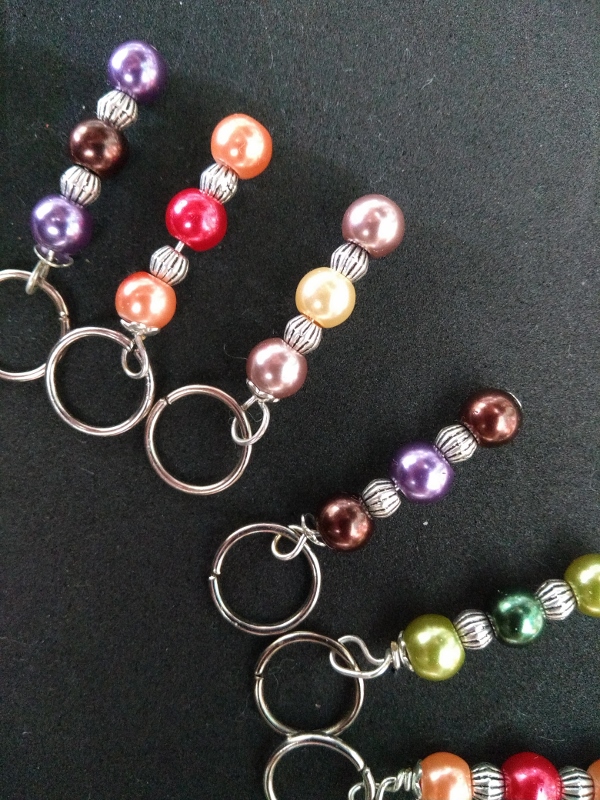
After much agonizing, when I learnt more about beads than I ever thought possible, I eventually decided to buy some 6mm pearlized beads, with 4mm spacer beads and 4mm flower shaped end caps. The colour of the beads was important. I wanted beads that looked like they belonged as a set, but also with enough colour variation that the resulting stitch markers would be easy to tell apart. This meant that I could use different colours to mark different aspects of my knitting.
The supplies arrived, and I spent a wonderful evening sorting my beads into different colours (thank you Monster for donating a compartmentalised tub!). And when I had my piles of beads, mixing and matching to find the colour combination I liked the best. I finally decided on four different colours; green, red, white and purple.
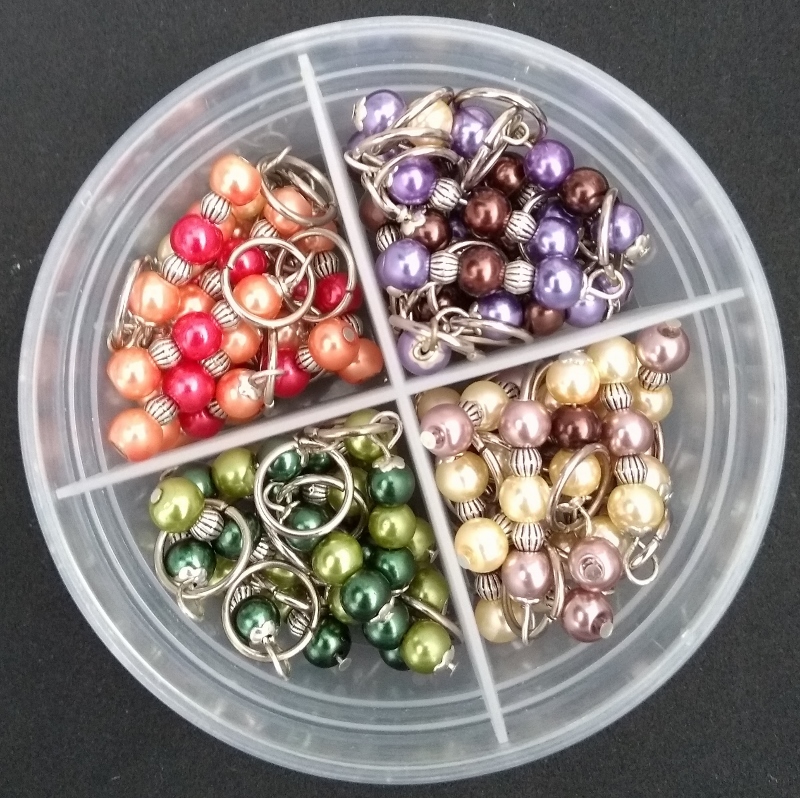
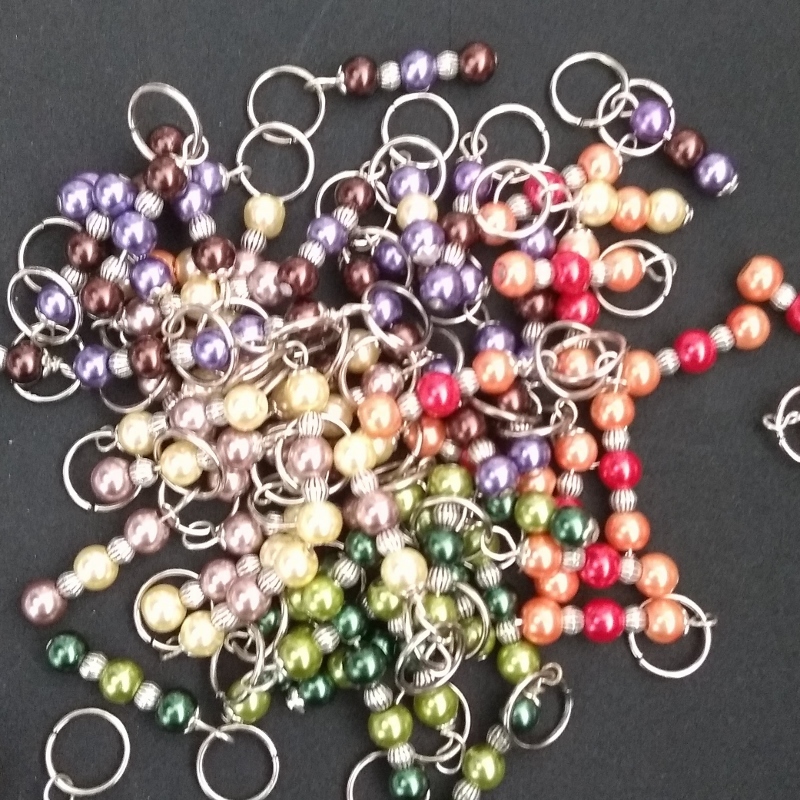
The making of the stitch markers was relatively straight forward. Initially I was surprised by the strength of the headpin but gathering my courage I curled it around the round nose pliers, and it didn’t break. After the first couple, it became very easy. Not all of my loops are perfect circles (in fact, not sure any are!) and they do vary in size. I’m sure an experienced jewellery maker would be aghast by the loops that I accepted. But I’m happy. I have a one of a kind set of handcrafted bead stitch markers. The colours and the filler beads are very me. Also, I think they are all constructed well enough that the beads will not fall off the headpin or jump ring.

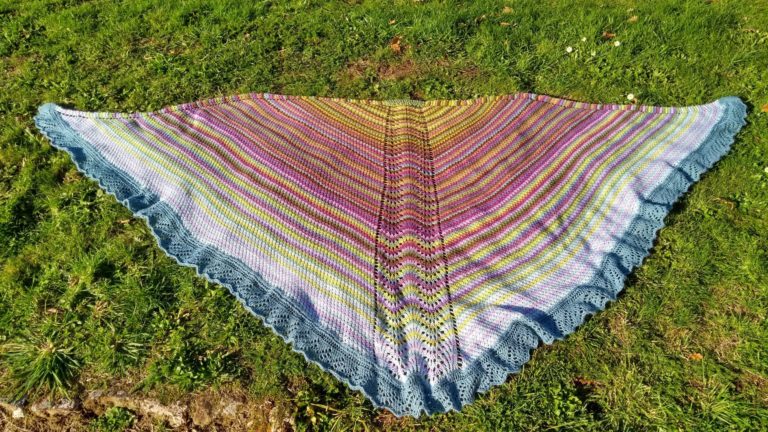
I used my stitch markers in making my moorland shawl. I enjoyed transferring the marker from needle to needle so much that I used them in places that I really didn’t need a marker! They also proved invaluable for marking out the repeat in the border (somehow I had managed to get the two sides of the shawl completely different lengths, which I would never have known without using stitch markers to plan out the repeat).
And now I need a row counter too…
I loved the stitch markers so much, that I also decided to make a row counter to complement the set with some of the left-over beads. Rather than starting from scratch, I copied a design from Etsy (Craft Cat Knitty Bits) and just needed a few additional findings. I love the cryptic nature of this row counter and think it looks really pretty hanging from my needles. The counter is a set of 10 rings. I marked the middle and last with a bead. You count by moving another bead along the set of rings. Once you reach 10, the counter hangs from the needles from the second ring, once 20 is reached, the counter hangs from the third ring and so on.
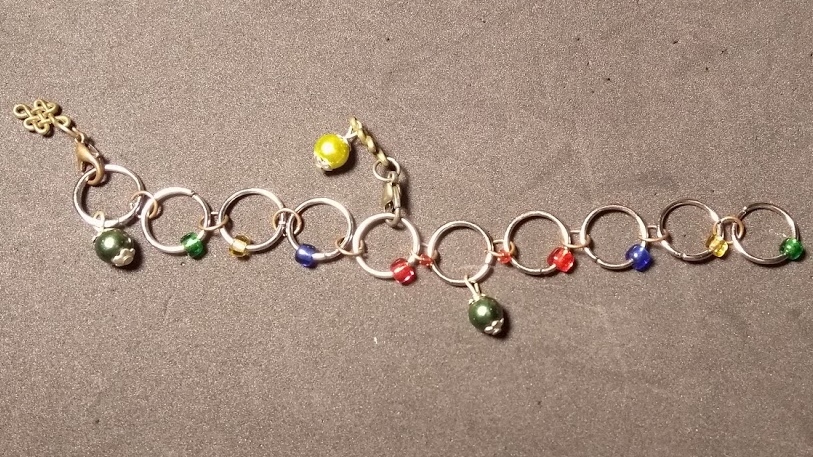


I also added a second movable bead. I use this to count repeats within a pattern. So for example, if I am knitting a sleeve, I want to know my overall row count, but I might also need to increase every 6th row. I can move the second bead 6 rows forward on the counter, so when I reach it, I know I have to increase. So much better than my old method of keeping track (pencil and back of an envelope).
Finally, my arsenal is complete with a set of lockable stitch markers too. Bring on the projects!