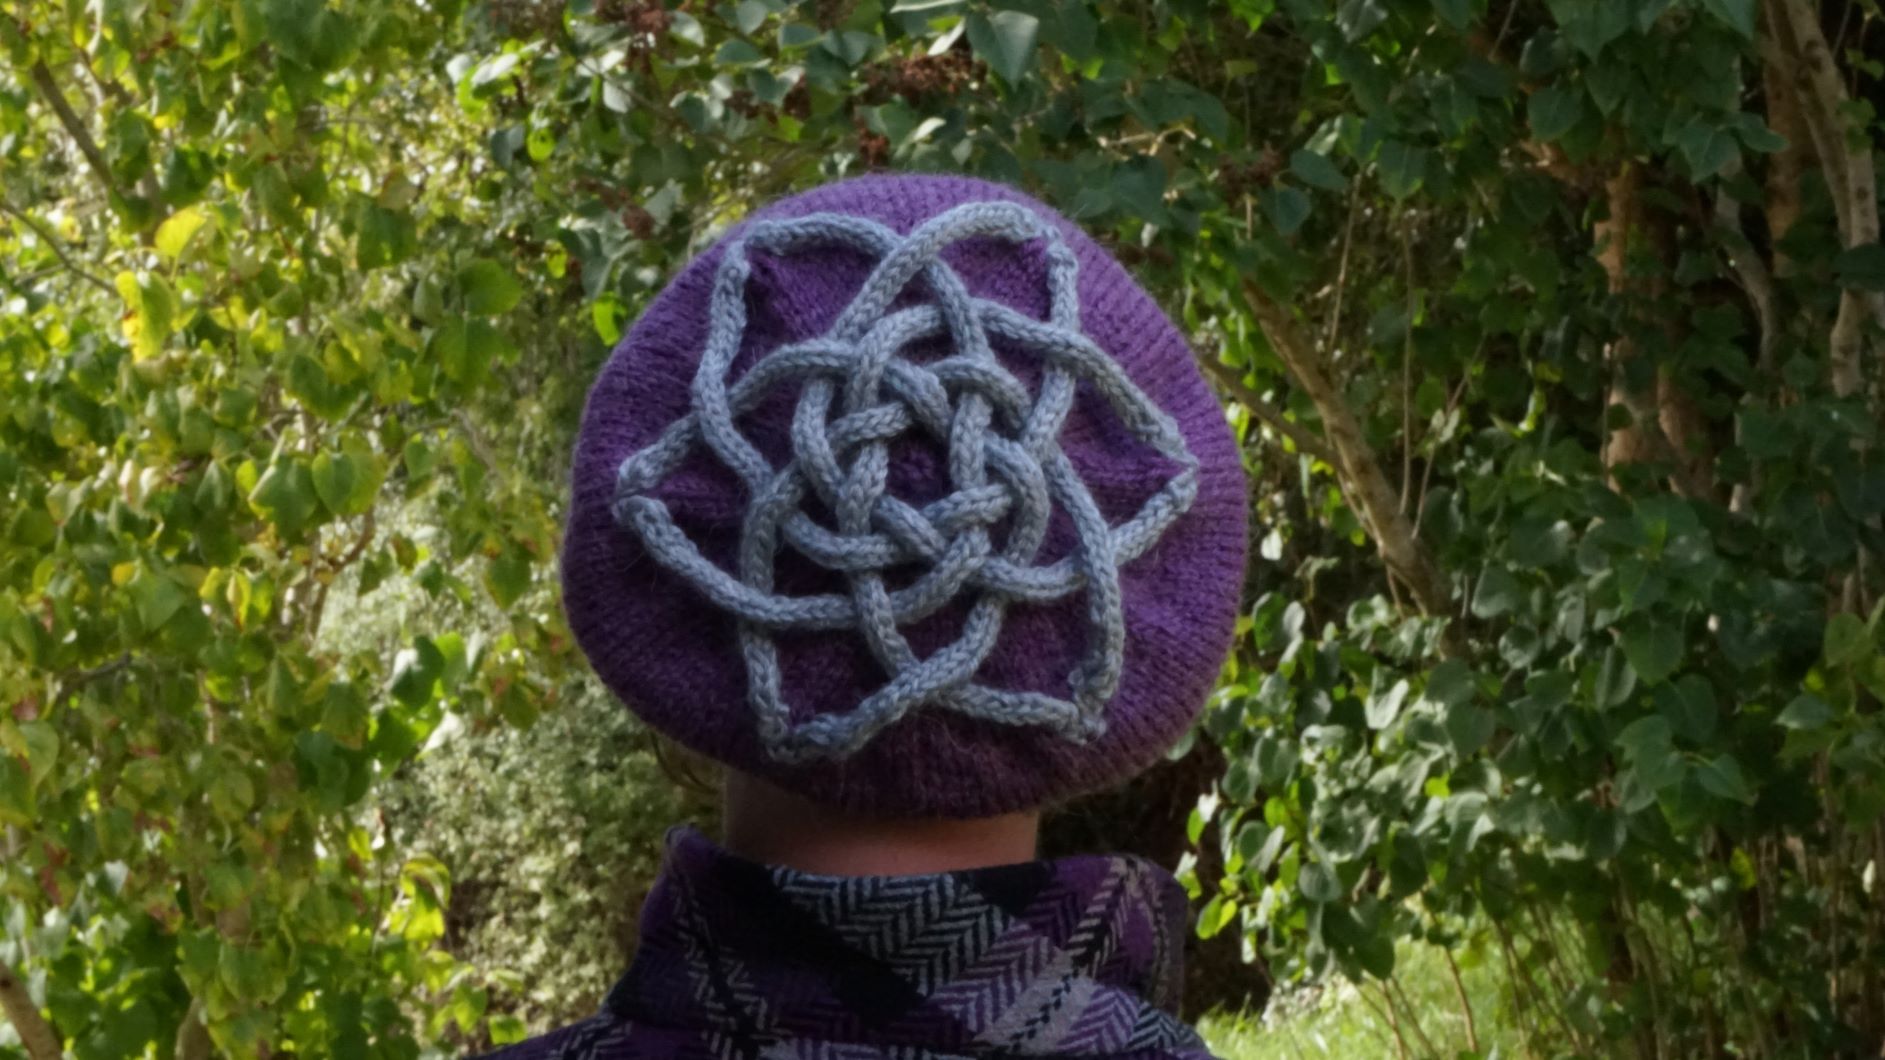
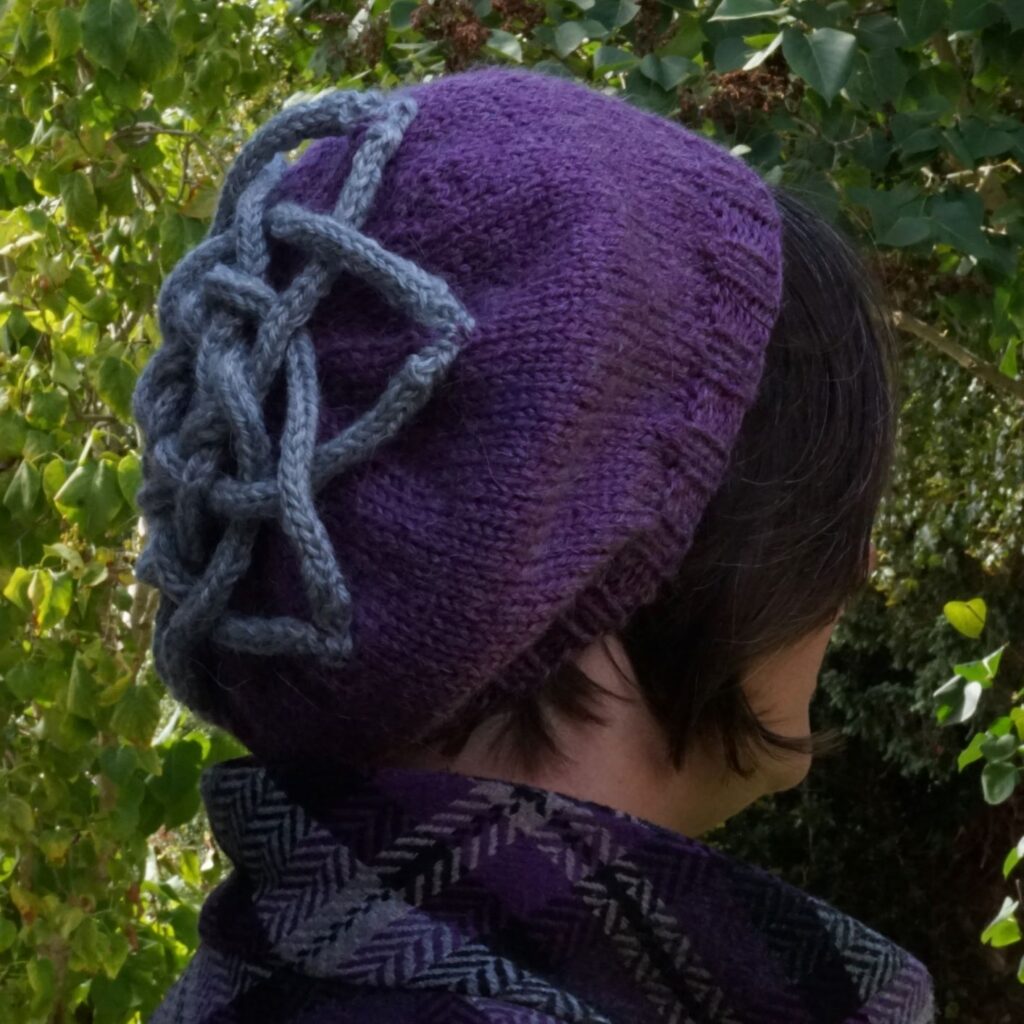
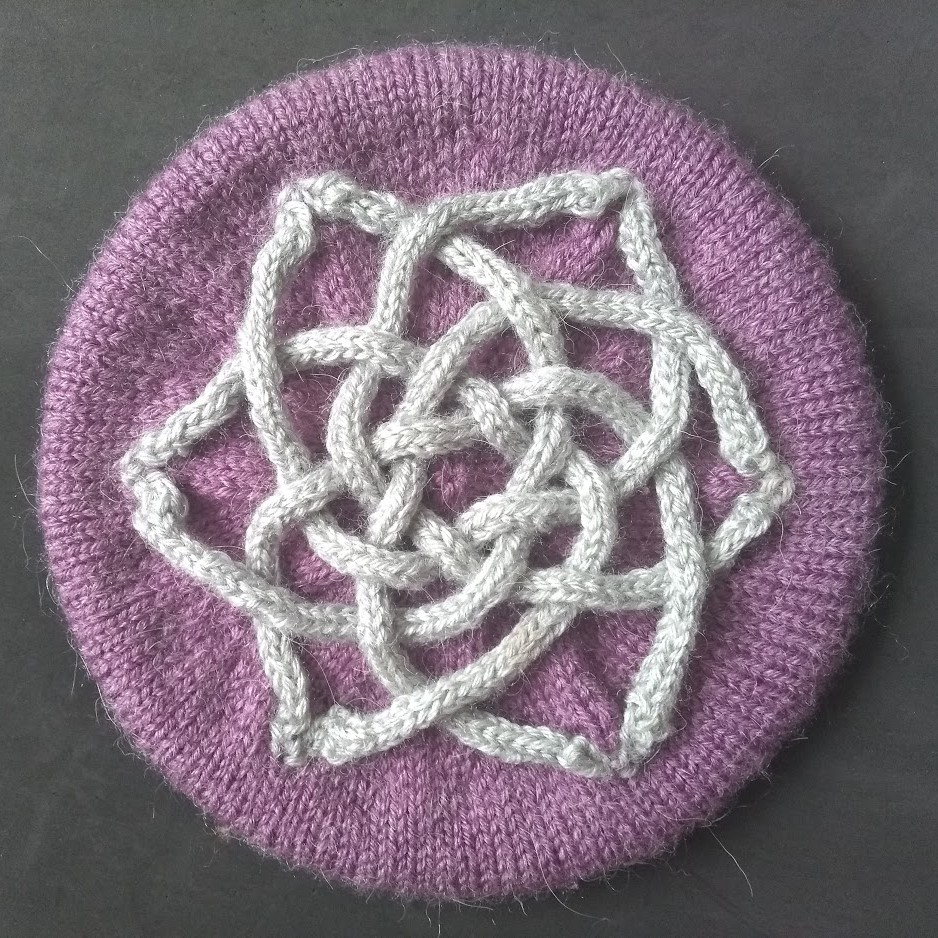
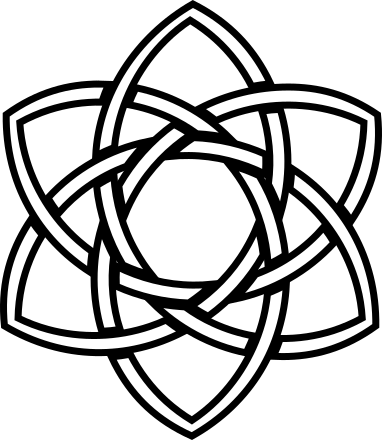
The Dunelm hat; a classic beret with a celtic knot twist, has been a long time in development. Longer ago than I care to remember, a friend gave me a book covering the basics of how to design your own celtic knots. It was while I was weaving some crochet strands together that I wondered about the possibilities of using i-cord to make a celtic knot. This would allow a much more complicated knot in a smaller space than could be achieved by cabling. A beret seemed the perfect shape to show off the interlacing to maximum effect. The result of this pondering: Dunelm.
The hat itself is a straightforward knit, but the pattern does use a range of techniques which may be new to many knitters. It’s a great pattern for dipping your toes in these techniques though (only three stitches to graft at a time, only four rounds of stranded knitting!).
This pattern is available on Ravelry and Payhip.
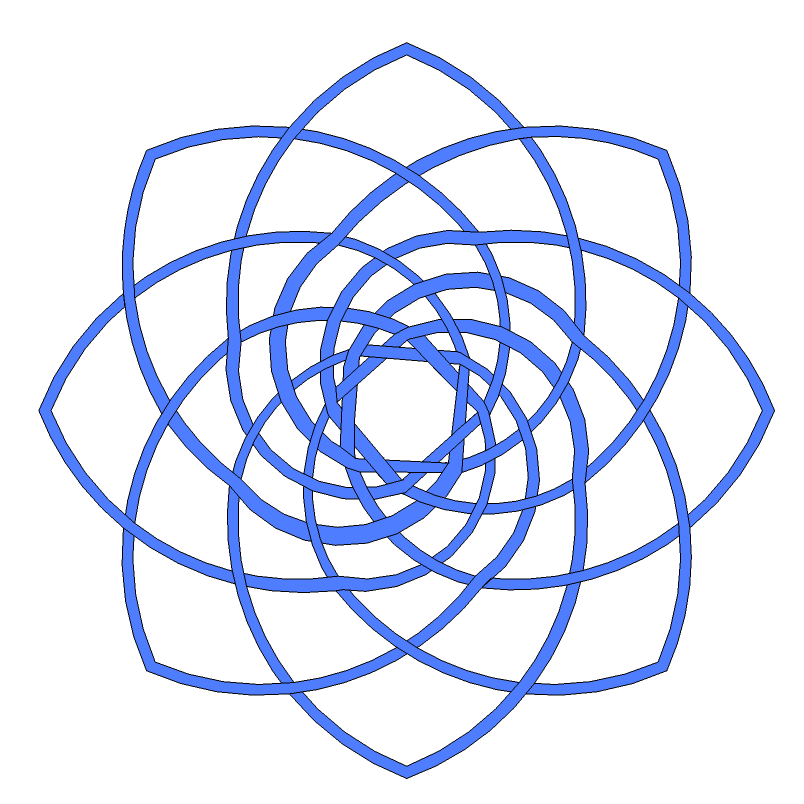
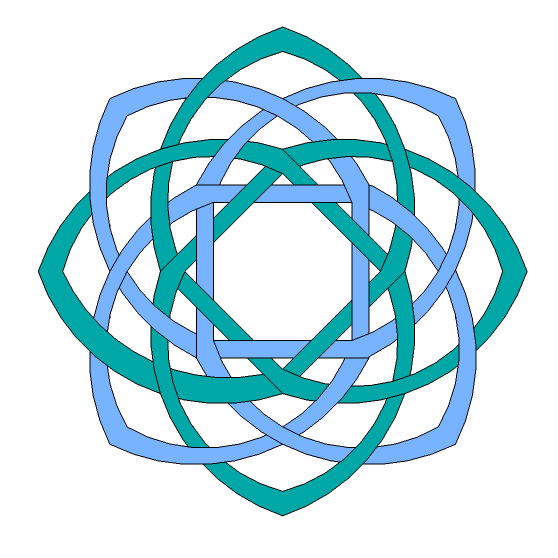
Weaving the knot may not be for everyone as it is quite fiddly. There are two different options for the knots: Option A is more complex, Option B is easier to weave as it is made from two separate triangular knots woven together.
Option A
Option B

Make it your own
You can place any celtic knot you like on the dunelm hat. There are two things to know to ensure that the knot looks right.
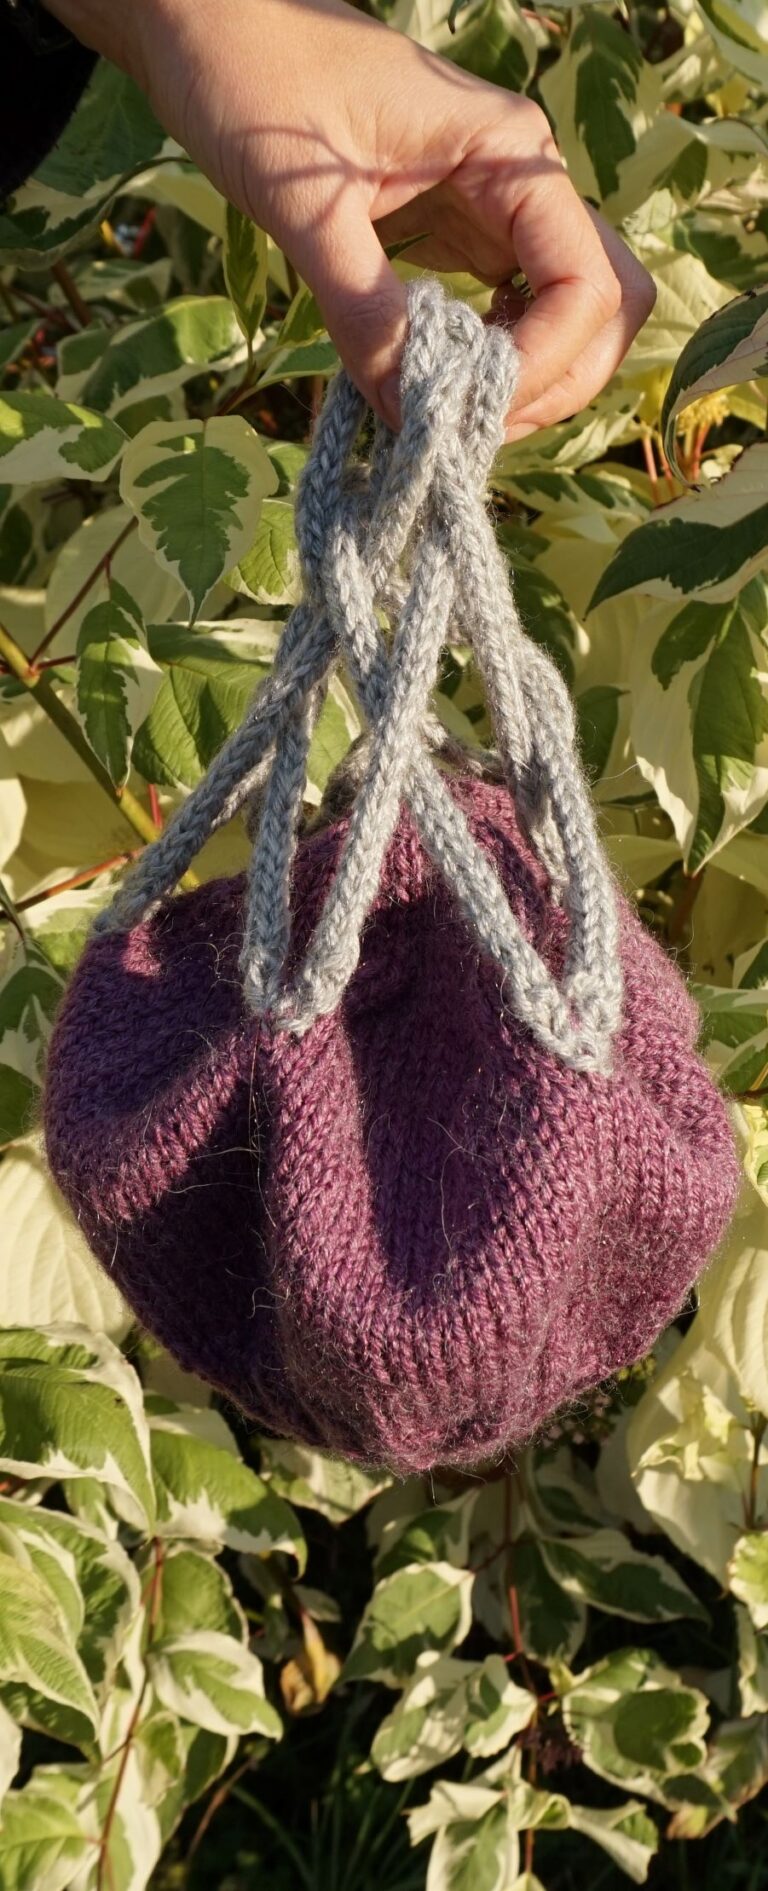
Firstly, the length of the i-cord. The basic rule of thumb here is the more complex the knot, the longer the i-cord should be. Allow extra length for additional cross-overs, and remove length if you are including fewer. I’m afraid this is a bit of trial and error. Work a length of i-cord and lay it across the hat, roughly where you would expect it on the finished design, and tweak until you like the look of it. Make sure you leave a very long tail on the i-cord as you are experimenting, so that it is easy to make the cord longer if required.
Secondly, you can adjust the thickness of the i-cord. For simpler knots you may prefer to have a thicker cord, to fill the space between strands. You can do this by either increasing the number of stitches in the i-cord (and then decreasing back down to three for the join) or use a heavier weight yarn.
I made use of these modifications in the grey and blue (Option B) dunelm hat above. I made the i-cords approximately 2cm (1 inch) shorter and used a chunky yarn to make the i-cords thicker (James C Brett marble chunky).
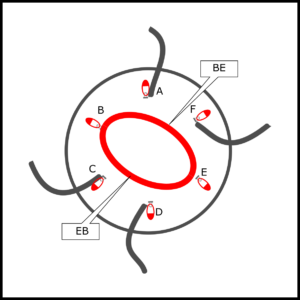
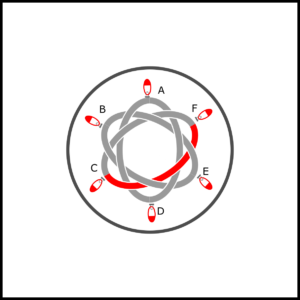
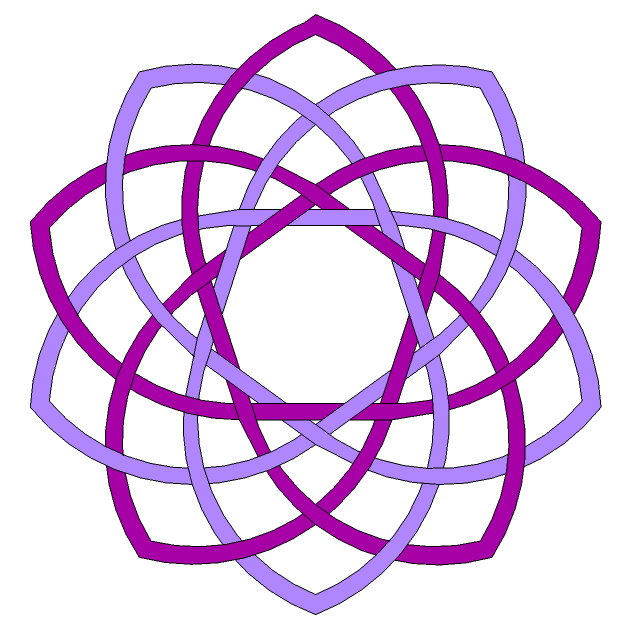
There is yet another option for the six point knot. This is the easiest of all to weave as it is created by three separate oval shapes and has few crossovers per strand.
Step 1
Place your hat on a flat surface with each strand spread out. The knot will be woven by creating three different oval shapes. Each strand is named for the different points it joins.
Step 2
Working with BE:- curve round to E
- curve round to B
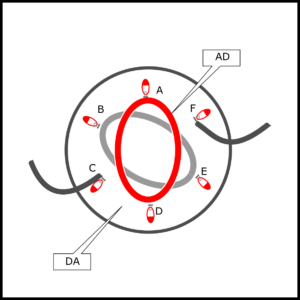
Step 3
Working with AD:- curve round to D,
- go over all strands.
- curve round to A,
- go over all strands.
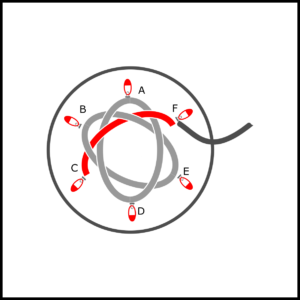
Step 4
Working with CF:- curve round to F,
- under EB,
- over DA,
- under BE,
- over AD.
Step 5
Working with FC:- curve round to C,
- under BE,
- over AD,
- under EB,
- over DA.


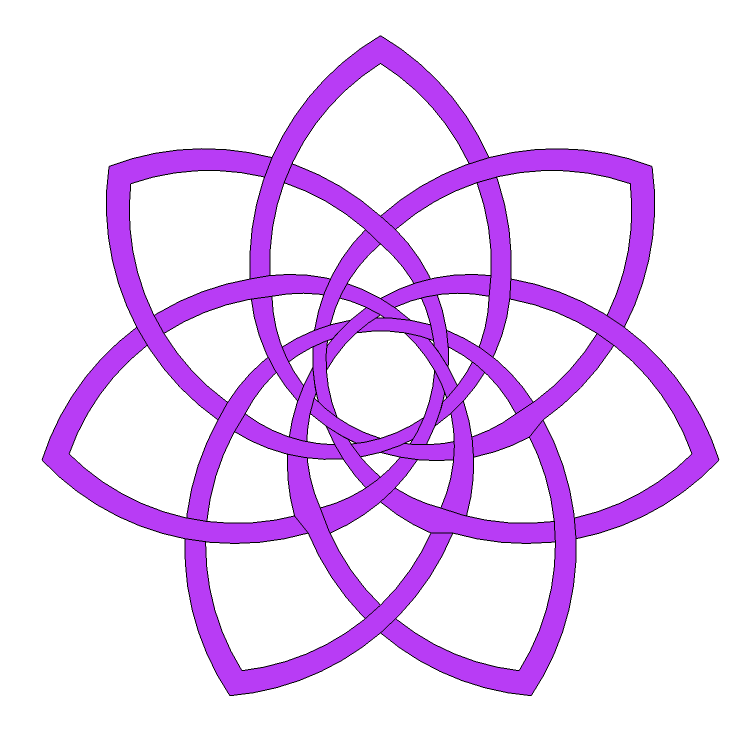
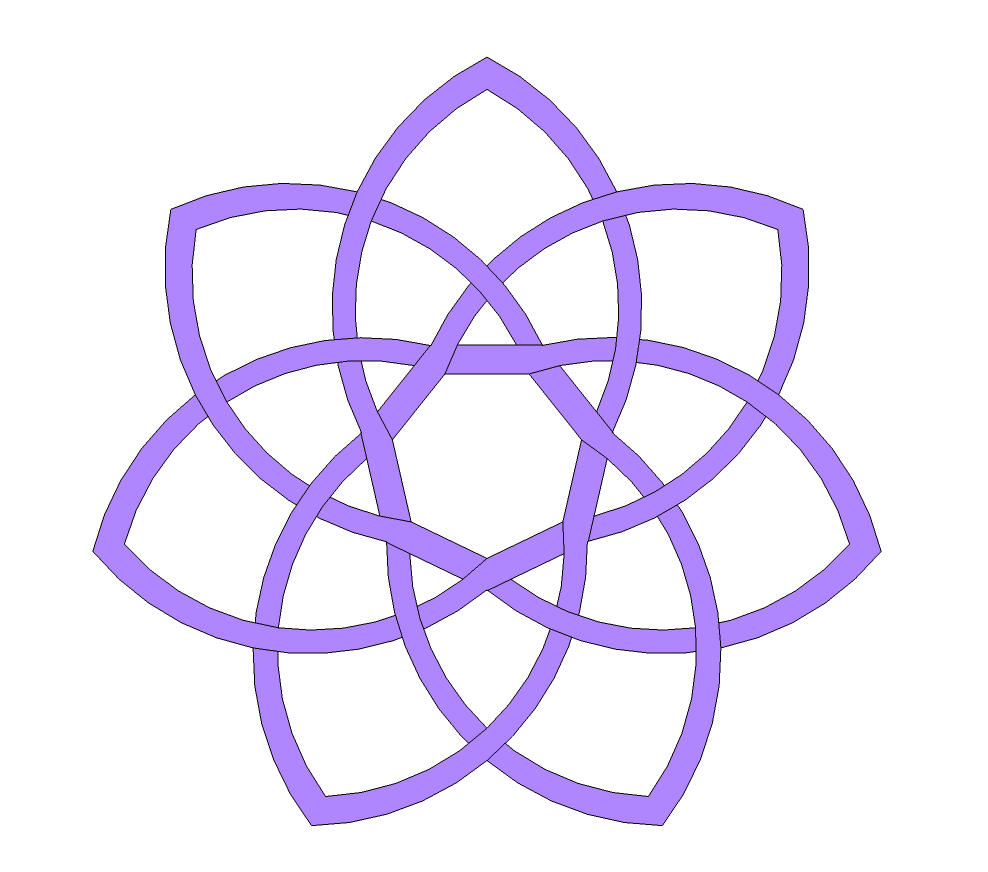
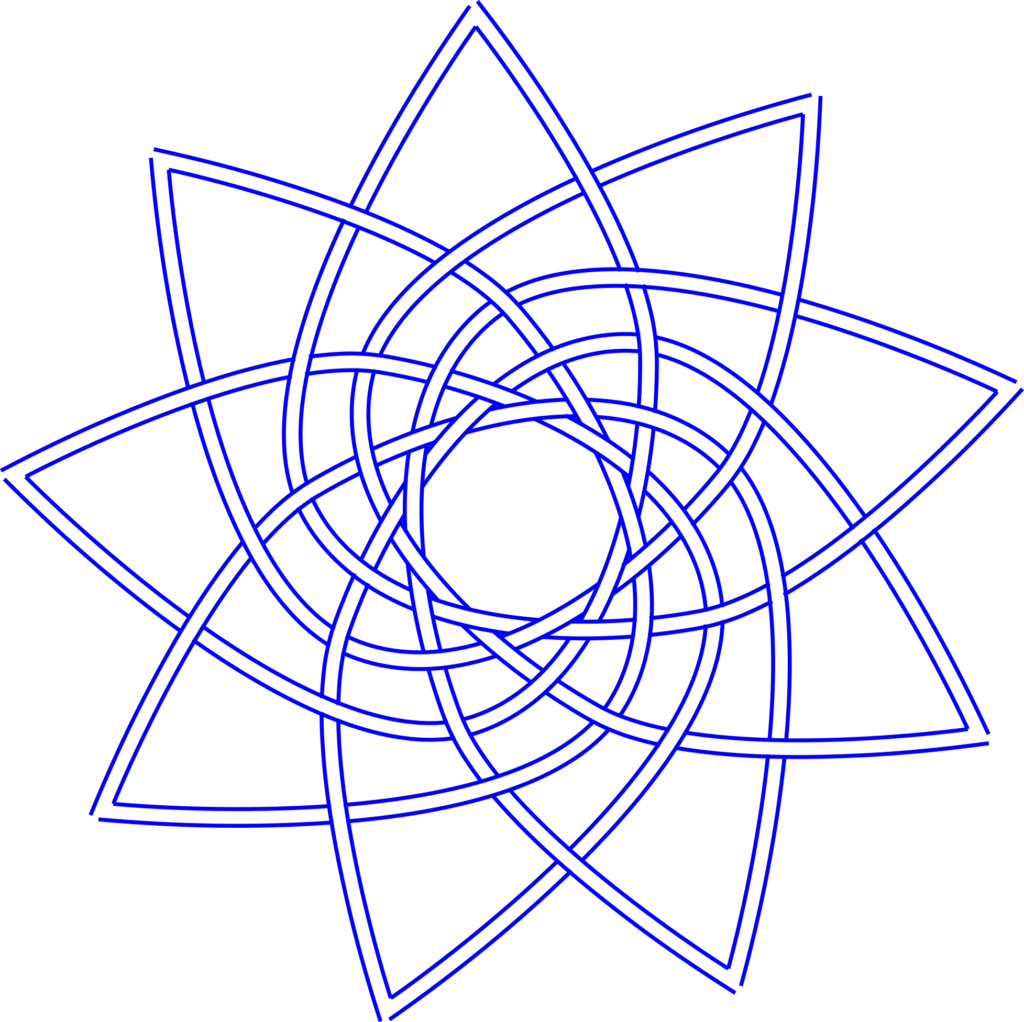
Knotty inspiration for the Dunelm hat
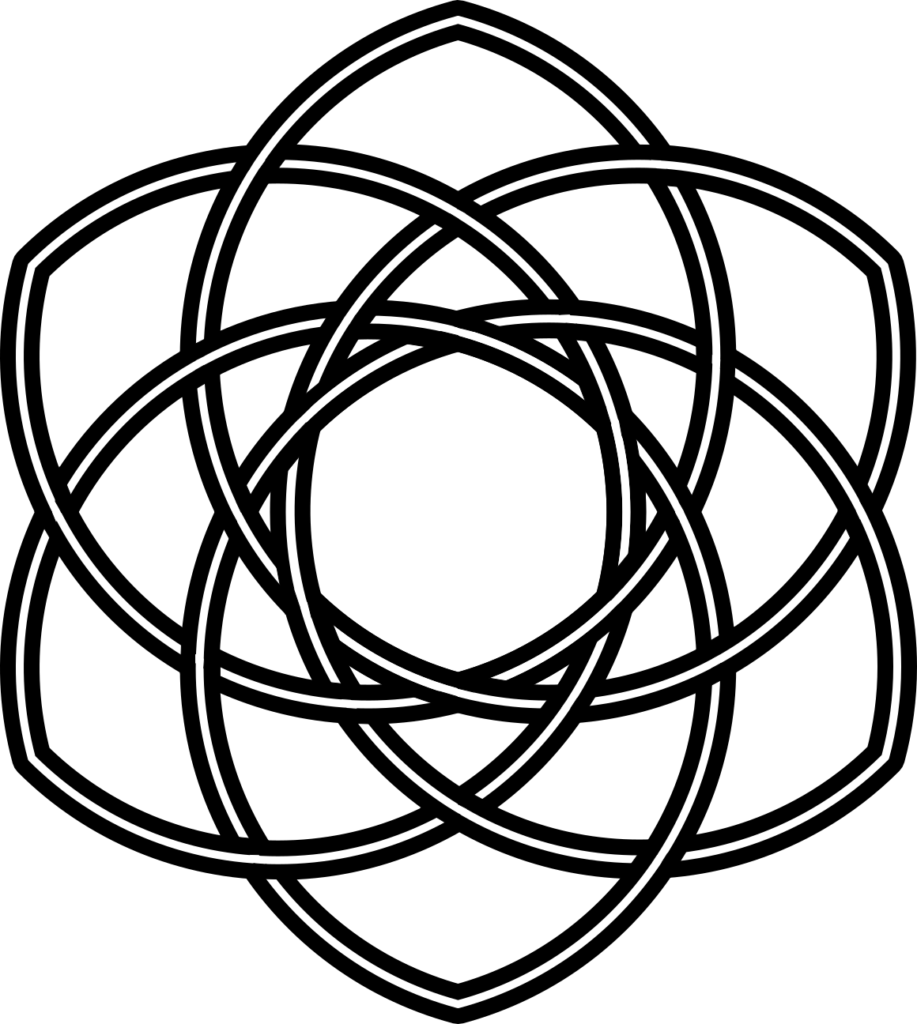
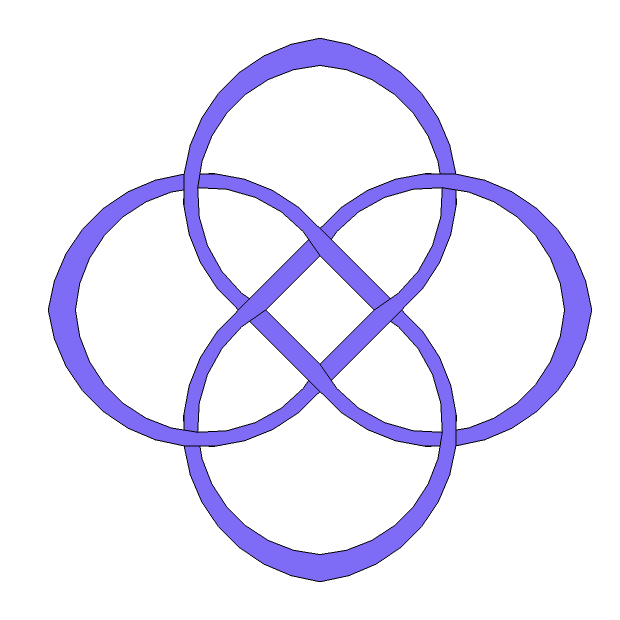
Although my celtic knot patterns are written for crochet, the weaving instructions will work just as well for i-cord. Any of the knots I’ve discussed on this blog will work on the dunelm hat. You could try single three or four loops. If you fancy something more complex, you could try a continuous loop knot for up to eight points, or the double loop option up to a whopping 10 pointer. There is something about the charm of the more odd numbered points: you don’t often see seven or nine pointed stars in many craft projects. In order to make these knots you will need to place the right number of anchor points evenly around the hat. To help with this, substitute the following instructions for the relevant rows in the original pattern.
Anchor points for the knot
4 points
Round 1: (In MC k13 [15, 16], in CC kyok, in MC k13 [14, 16]) repeat to the end of the round. 116 [128, 140] sts.
You should now have four sets of three CC stitches, separated by 26 [29, 32] MC stitches. The start of the round should fall in the centre of one of the groups of MC stitches.
Round 3: (In MC k13 [15, 16], in CC kyok, in MC k1, in CC kyok, in MC k13 [14, 16]) repeat to end of round. 132 [144, 156] sts.
You should now have four sets of six CC stitches evenly distributed around the hat. Each set of six should be arranged in threes with a single MC stitch between them.
7 points
For small size (18in/ 45 cm)
Round 1: (In MC k7 [-,-], in CC kyok, in MC k15 [-,-], in CC kyok, in MC k7 [-,-]) three times, in MC k7 [-,-] in CC kyok, in MC k7 [-,-]. 122 [-,-] sts.
You should now have seven sets of three CC stitches, separated by 14(15) [-,-] MC stitches. The start of the round should fall in the centre of one of the groups of MC stitches.
Round 3: (In MC k7 [-,-], in CC kyok, in MC k1, in CC kyok, in MC k15 [-,-], in CC kyok, in MC k1, in CC kyok, in MC k7 [-,-]) three times, in MC k7 [-,-], in CC kyok, in MC k1, in CC kyok, in MC k7 [-,-]. 150 [-,-] sts.
For medium and large size (20,22in/50,55cm)
Round 1: In MC k- [9, 9], in CC kyok, (in MC k- [16, 18], in CC kyok) six times, in MC k- [8, 8]. – [134, 146] sts.
You should now have seven sets of three CC stitches, separated by – [16(17), 17(18)] MC stitches. The start of the round should fall in the centre of one of the groups of MC stitches.
Round 3: (In MC k- [9, 9], in CC kyok, in MC k1, in CC kyok, (in MC k- [16, 18], in CC kyok, in MC k1, in CC kyok) six times, MC k- [8, 8]. – [162, 174] sts.
You should now have seven sets of six CC stitches distributed relatively evenly around the hat. Each set of six should be arranged in threes with a single MC stitch between them.
9 points
Round 1: (In MC k6 [7, 7], in CC kyok, (in MC k11 [12, 14], in CC kyok) twice, in MC k5 [6, 6]) repeat to the end of the round. 128 [140, 152] sts.
You should now have nine sets of three CC stitches, separated by 9(10) [11, 12(13)] MC stitches. The start of the round should fall in the centre of one of the groups of MC stitches.
Round 3: (In MC k6 [7, 7], in CC kyok, in MC k1, in CC kyok, (in MC k11 [12, 14], in CC kyok, in MC k1, in CC kyok) twice, MC k5 [6, 6]) repeat to the end of the round. 168 [180, 192] sts.
You should now have nine sets of six CC stitches distributed relatively evenly around the hat. Each set of six should be arranged in threes with a single MC stitch between them.
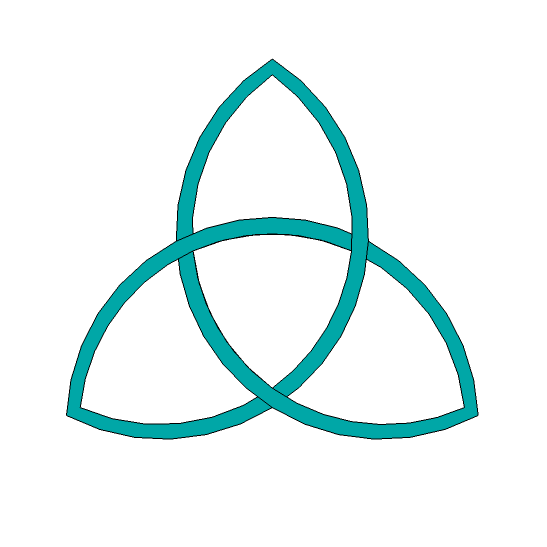
3 points
Round 1: (In MC k18 [20, 22], in CC kyok, in MC k17 [19, 21]) repeat to the end of the round. 114 [126, 138] sts.
You should now have three sets of three CC stitches, separated by 35 [39, 43] MC stitches. The start of the round should fall in the centre of one of the groups of MC stitches.
Round 3: (In MC k18 [20, 22], in CC kyok, in MC k1, in CC kyok, in MC k17 [19, 21]) repeat to end of round. 126 [138, 150] sts.
You should now have three sets of six CC stitches evenly distributed around the hat. Each set of six should be arranged in threes with a single MC stitch between them.

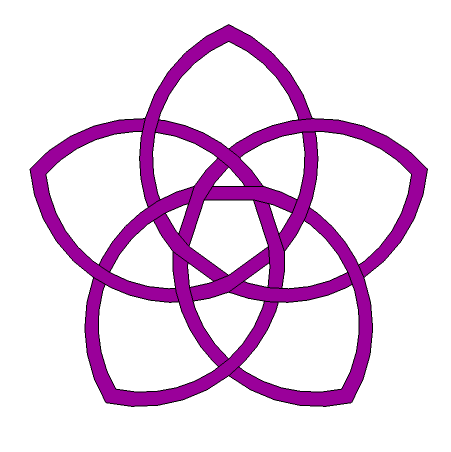
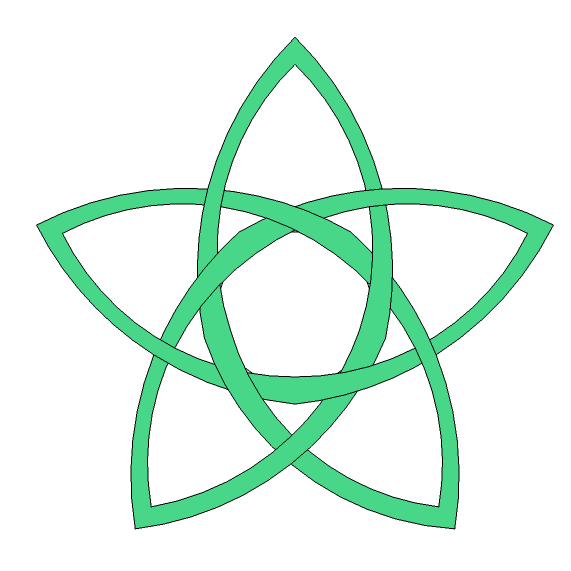
5 points
Round 1: (In MC k11 [12, 13], in CC kyok, in MC k20 [23, 26], in CC kyok, in MC k10 [11, 12]) twice, in MC k11 [12 ,13], in CC kyok, in MC k10 [11, 12]. 118 [130, 142] sts.
You should now have five sets of three CC stitches, separated by 20(21) [23, 25(26)] MC stitches. The start of the round should fall in the centre of one of the groups of MC stitches.
Round 3: (In MC k11 [12, 13], in CC kyok, in MC k1, in CC kyok, in MC k20 [23, 26], in CC kyok, in MC k1, in CC kyok, in MC k10 [11, 12]) twice, in MC k11 [12 ,13], in CC kyok, in MC k1, in CC kyok, in MC k10 [11, 12]. 138 [150, 162] sts.
You should now have five sets of six CC stitches distributed relatively evenly around the hat. Each set of six should be arranged in threes with a single MC stitch between them.
8 points
Round 1: (In MC k6 [7, 8], in CC kyok, in MC k13 [14, 16], in CC kyok, in MC k6 [7, 7]) repeat to the end of the round. 124 [136, 148] sts.
You should now have eight sets of three CC stitches, separated by 12(13) [14, 15(16)] MC stitches. The start of the round should fall in the centre of one of the groups of MC stitches.
Round 3: (In MC k6 [7, 8], in CC kyok, in MC k1, in CC kyok, in MC k13 [14, 16], in CC kyok, in MC k1, in CC kyok, in MC k6 [7, 7]) repeat to the end of the round. 156 [168, 180] sts.
You should now have eight sets of six CC stitches distributed relatively evenly around the hat. Each set of six should be arranged in threes with a single MC stitch between them.
10 points
Round 1: (In MC k5 [6, 7], in CC kyok, (in MC k10 [11, 12], in CC kyok) four times, in MC k4 [5, 6]) repeat to the end of the round. 128 [140, 152] sts.
You should now have ten sets of three CC stitches, separated by 9(10) [11, 12(13)] MC stitches. The start of the round should fall in the centre of one of the groups of MC stitches.
Round 3: (In MC k5 [6, 7], in CC kyok, in MC k1, in CC kyok, (in MC k10 [11, 12], in CC kyok, in MC k1, in CC kyok) four times, MC k4 [5, 6]) repeat to the end of the round. 168 [180, 192] sts.
You should now have ten sets of six CC stitches distributed relatively evenly around the hat. Each set of six should be arranged in threes with a single MC stitch between them.
I hope these modifications prove useful, and that you can craft your very own, unique dunelm hat! Please share, I would love to see what you create.